Toyota HZJ75 Landcruiser

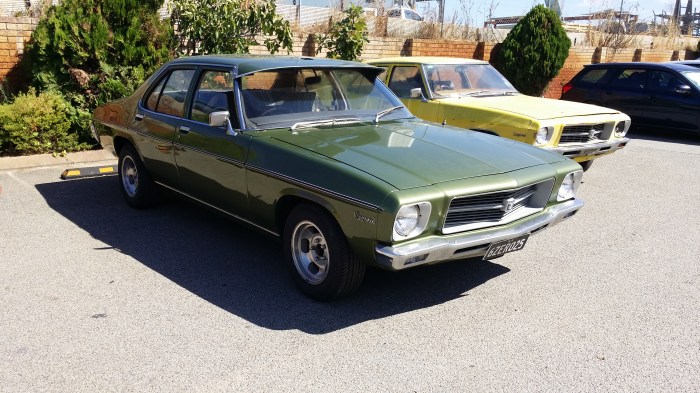
Despite Toyota’s efforts to improve their past models, the relentless corrosion continues to wreak havoc on these seemingly indestructible vehicles. This particular vehicle has endured a tough life, and the signs of neglect are unmistakable. At Auto Resto, we rarely decline projects, so we gladly accepted this challenge.

At Auto Resto, we accept the challenges that others decline.

Turret aperture

The corrosion damage around the front windscreen aperture was so severe that we needed to fabricate an entire new turret centre section and each of the turret corners to complete the repair.

Additionally, the internal turret reinforcement section was replaced.

Our highly skilled artisans crafted all the panels shown here in-house.
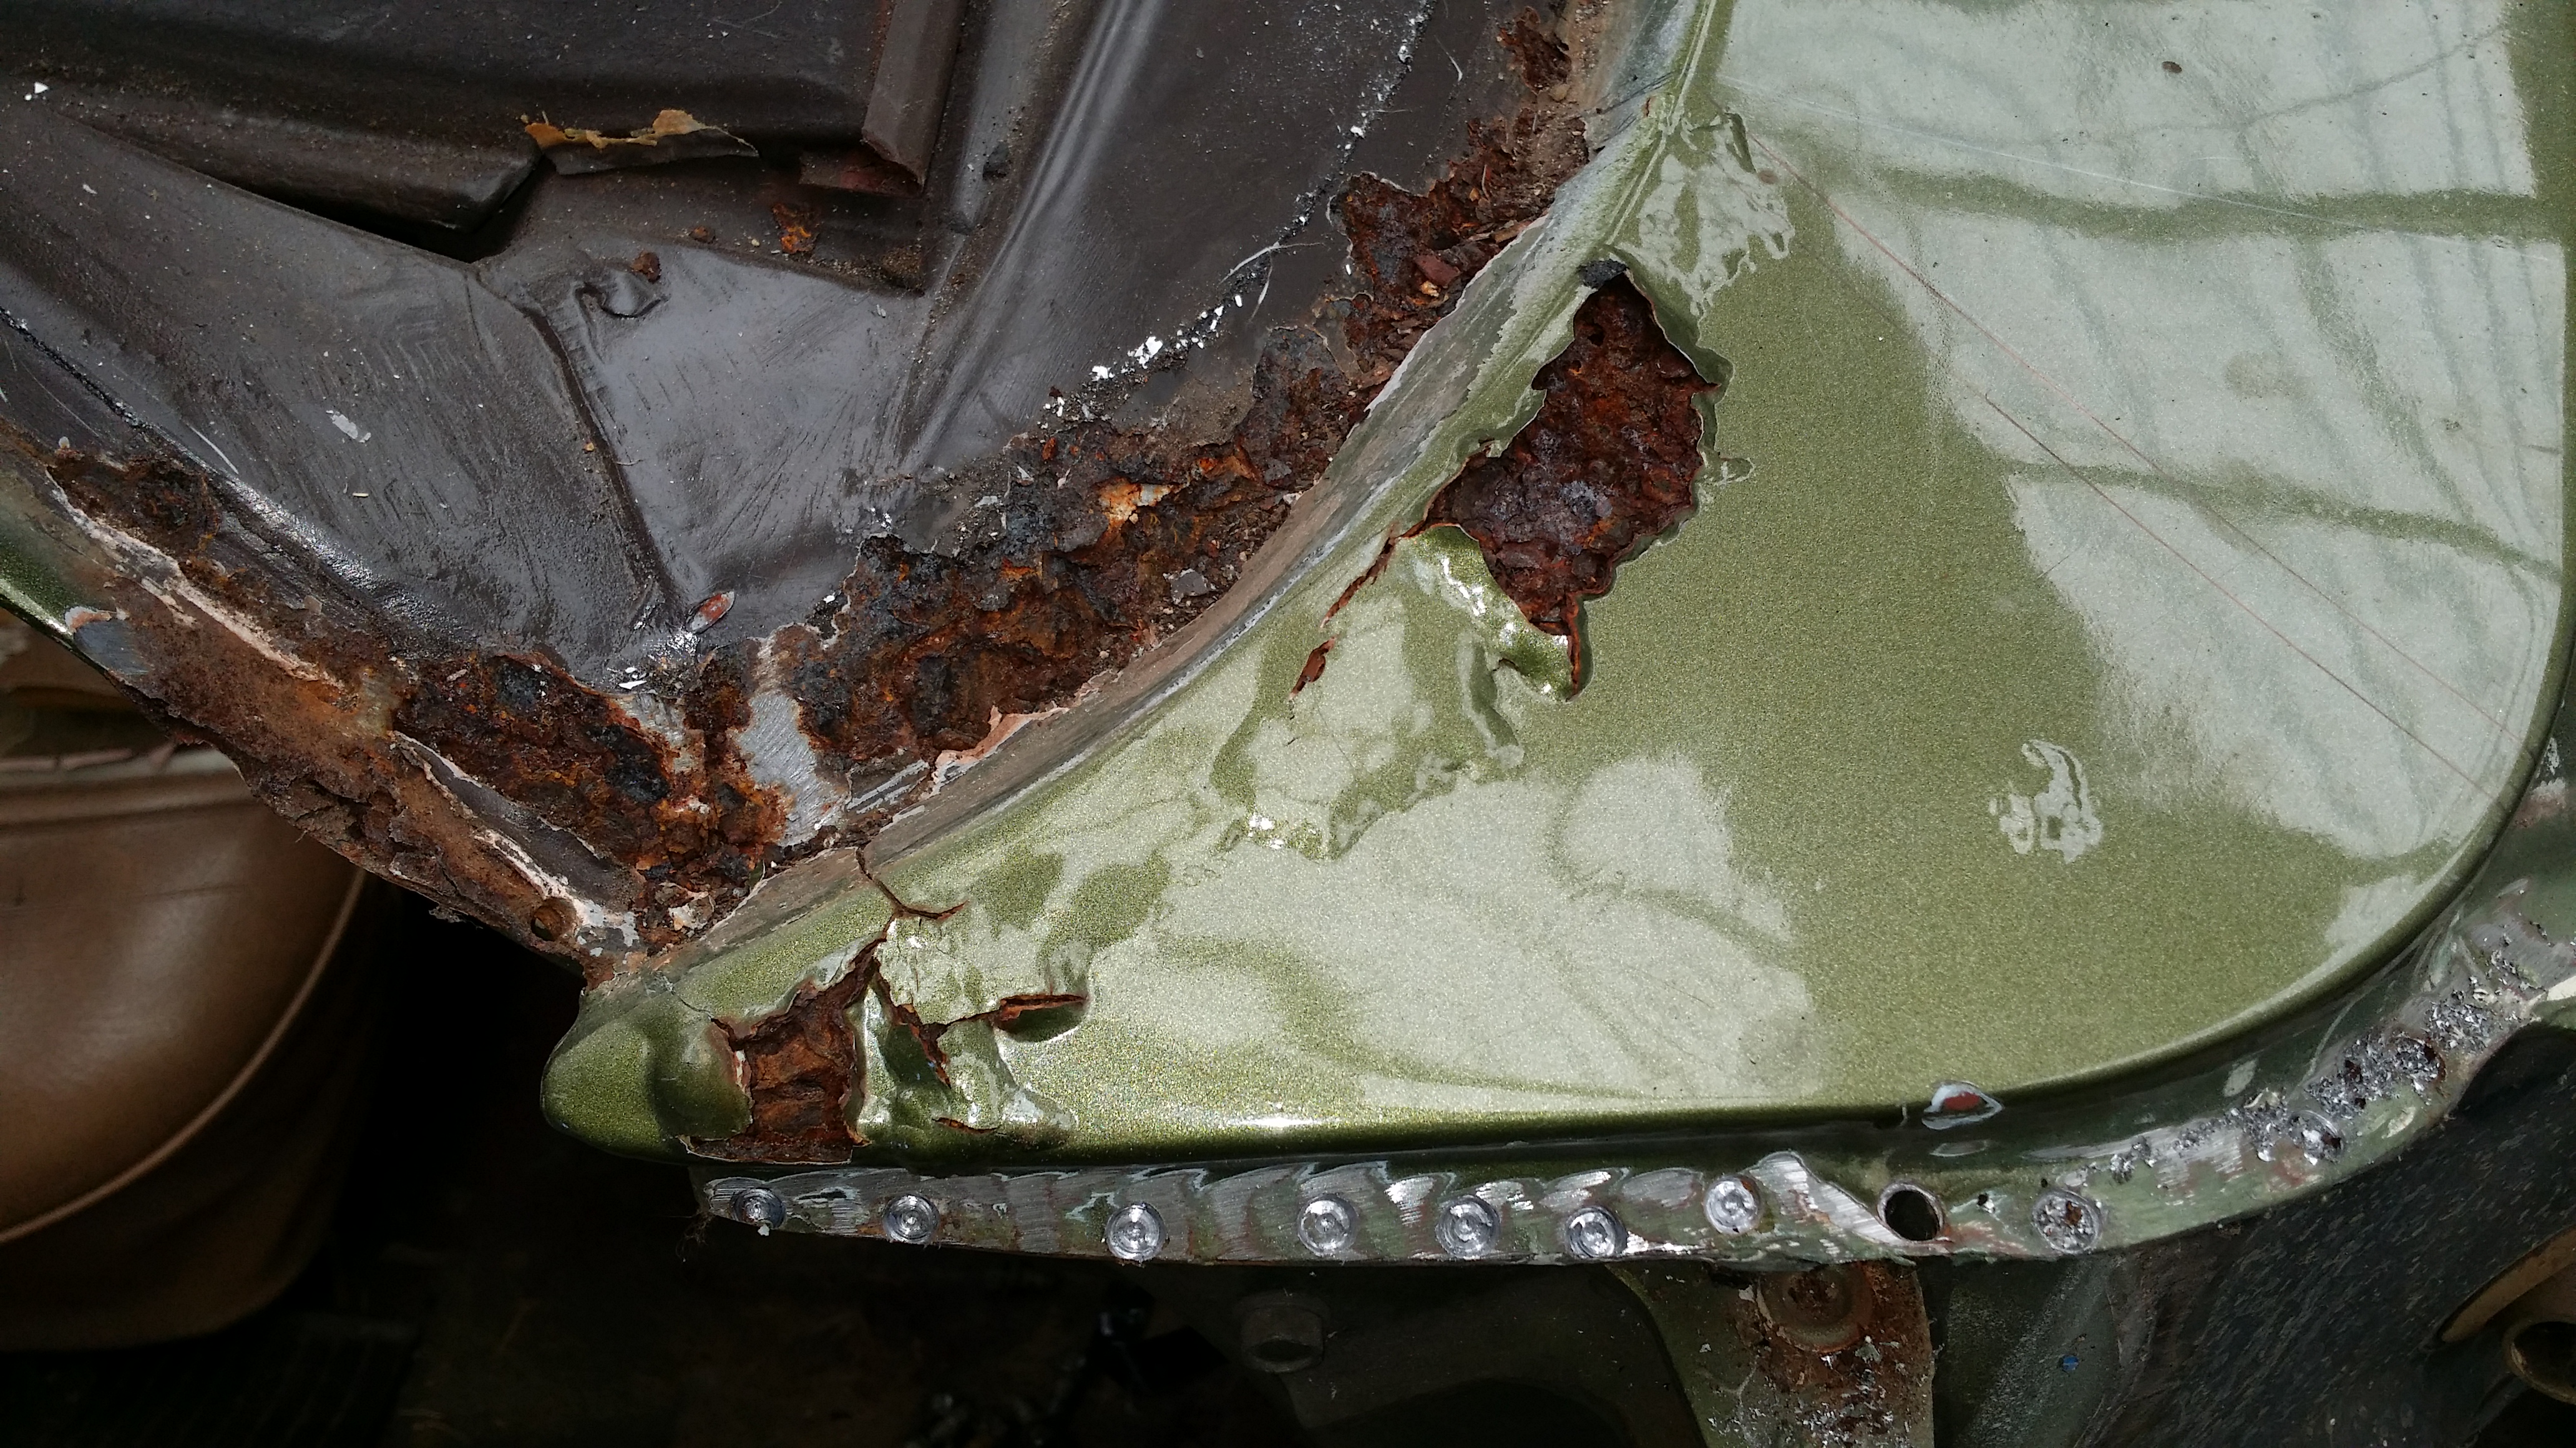
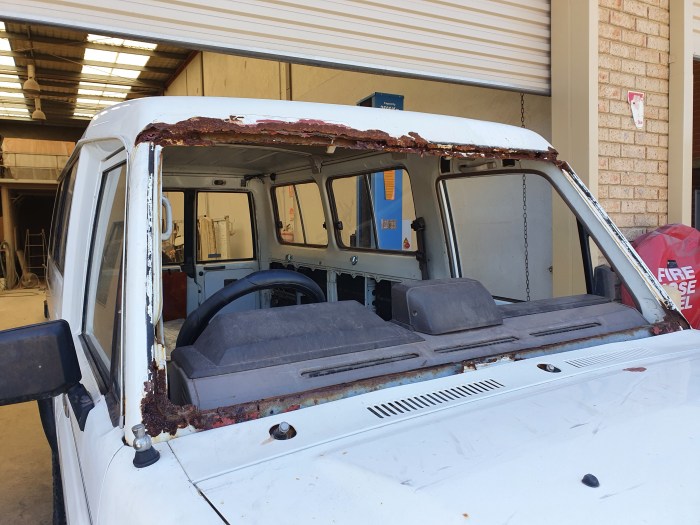
LHS Turret Corner – Corrosion Damage
LHS Turret Corner – Panel Fabrication
RHS Bulkhead Corner – Corrosion Damage
RHS Bulkhead Corner – Panel Fabrication

Bulkhead Aperture

The corrosion damage to the bulkhead section was further complicated by the extensive corrosion found in the A-Pillar sections, the bulkhead reinforcement, and behind the dash panel instruments.

To ensure safety during the repairs, the cabin interior and dash panel instruments were removed to eliminate the potential risk of fire.

The fabricated panel sections illustrated here were just the beginning, as further repairs were still required.

LHS Turret frame

While repairing the left-hand side (LHS) turret corner, it was discovered that the frame had been weakened by corrosion.

The turret frame, which is integral to the door frame aperture, had to be repaired with a new section. The turret frame, which plays a crucial role in the door frame aperture, required repair. A new section was fabricated to replace the damaged portion which was subsequently cut out and replaced.

The repair of the frame’s top corner was successfully completed before proceeding with fabrication of the drip rail panel.
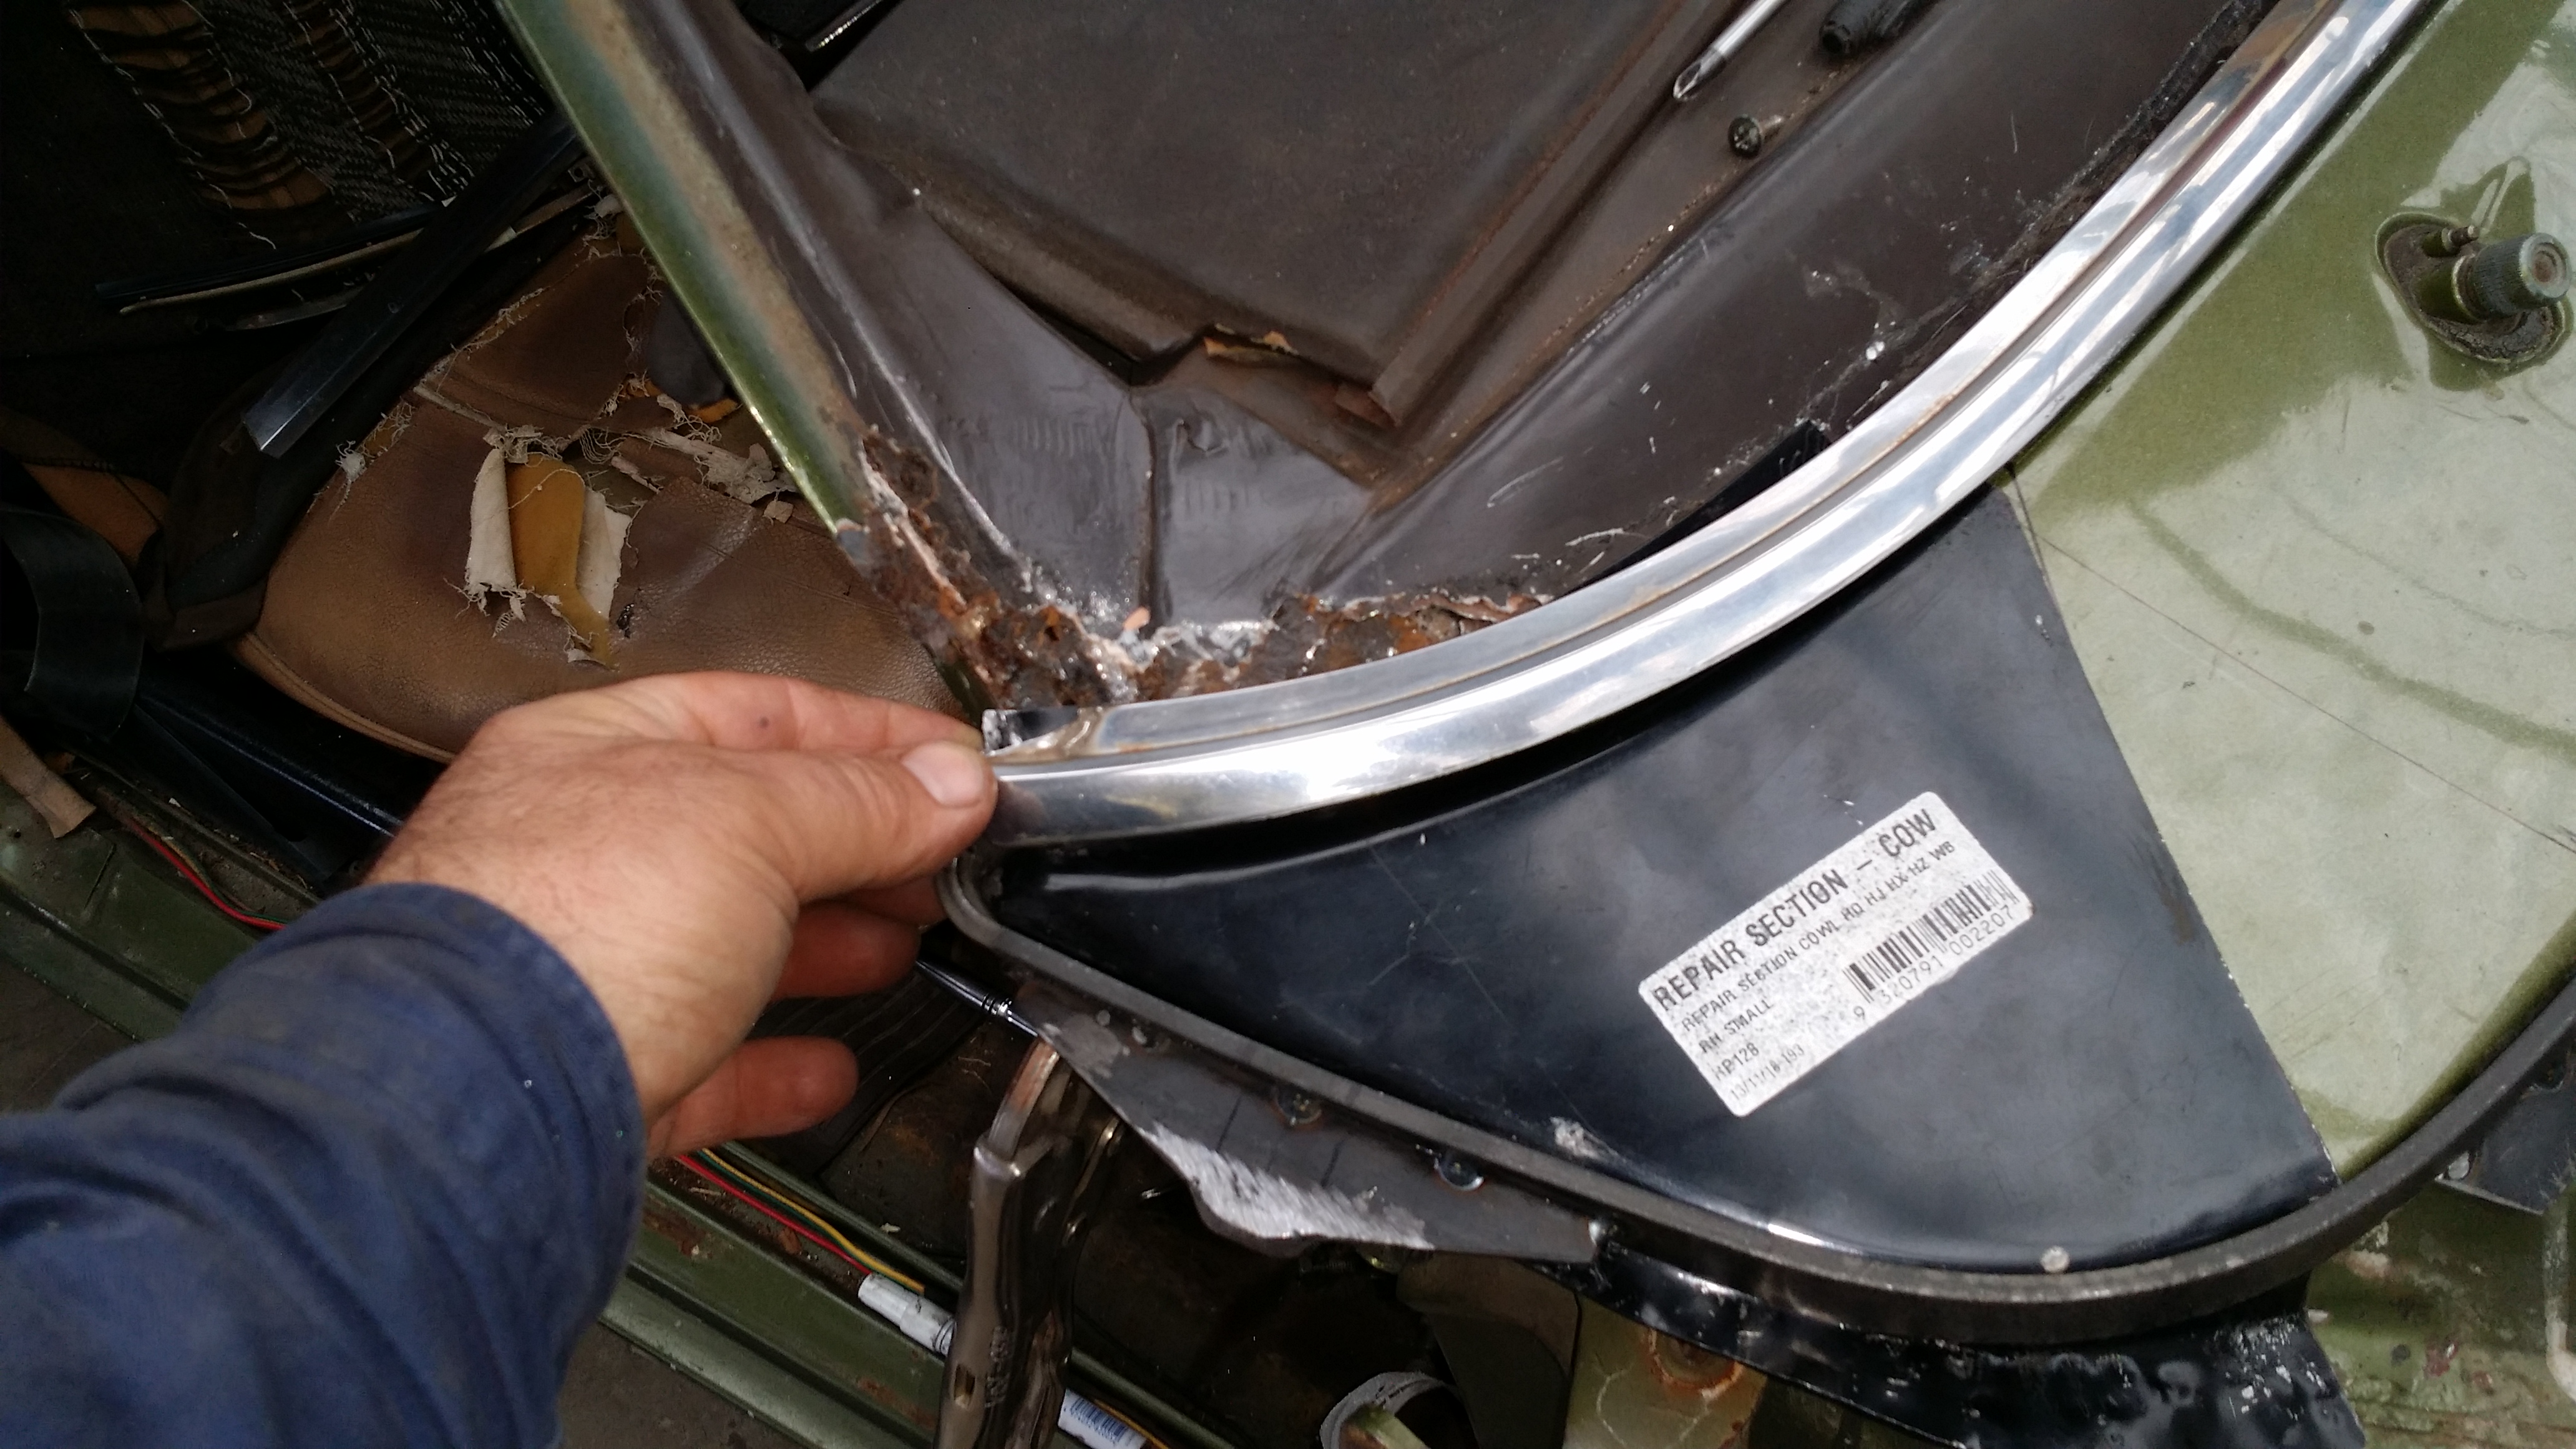
LHS Turret Frame – Corrosion
LHS Turret Frame – Repair
LHS A-Pillar Drip Rail – Repair
LHS A-Pillar Drip Rail – Panel Fabrication

Pillar Drip rail

During the repair of the LHS turret corner and frame, it was necessary to remove the drip rail (gutter) section. It was discovered that the drip rail had suffered extensive corrosion along its entire length, resulting in weakened structural integrity.

To address this issue, a new drip rail panel section was fabricated and carefully shaped to fit the vehicle.
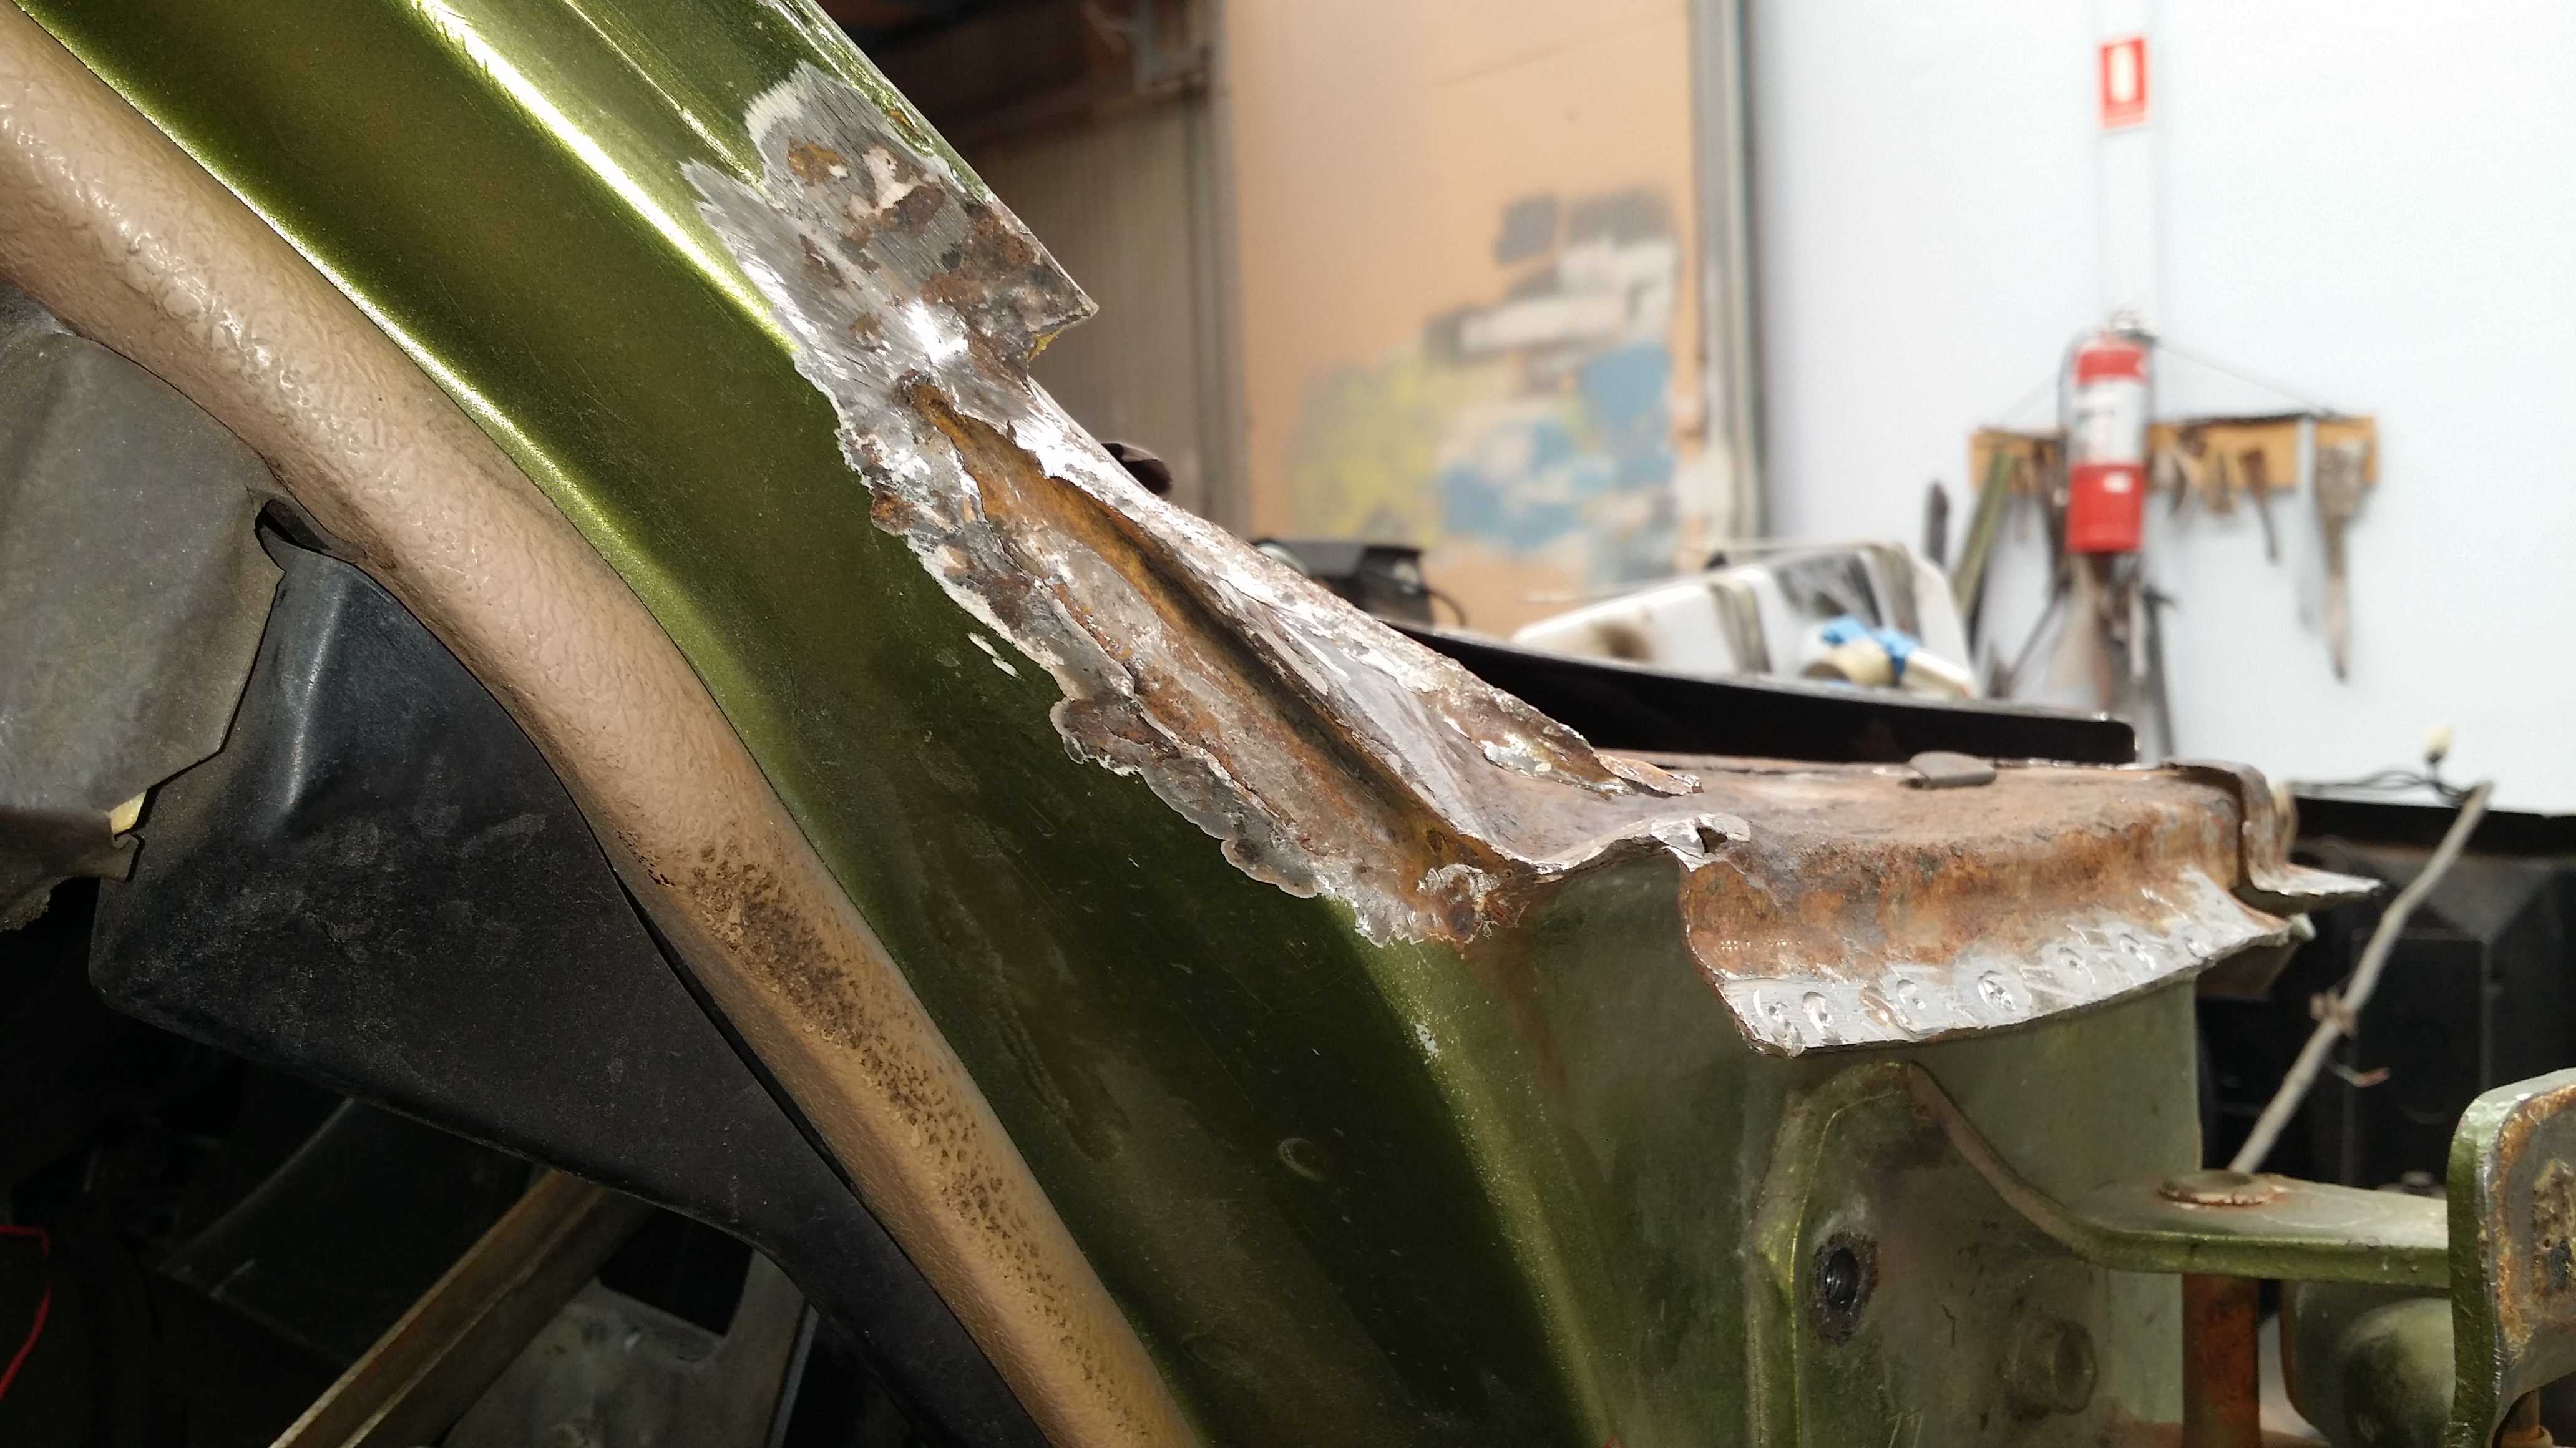
A-Pillar Section

The lower section of the A-pillars displayed visible corrosion damage, which is typically caused by water ingress originating from the turret section.

The A-pillar is made up of overlapping panel sections, which forms to provide the overall structural strength and rigidity of the vehicle.

LHS A-Pillar – External Corrosion Damage
LHS A-Pillar – Internal Corrosion
LHS A-Pillar – Corrosion Cleaning
LHS Door Aperture – Corrosion Cleaning

cleaning process

At Auto Resto, every repair is performed with great attention to detail, and one crucial aspect is ensuring that the surface is thoroughly prepared and cleaned to eliminate any corrosion contaminants.

To achieve a high-quality finish that meets the Australian Standards AS 1627.4—2005 for metal finishing and surface pre-treatment, we employ a combination of processes and techniques. These methods ensure that the repaired surface meets the required standards for durability.

Our approach also includes multi-staged pre and post coating treatments.

Panel fabrication

At Auto Resto, metal fabrication is a crucial part of most projects. Finding ready-made replacement panel sections, even for modern vehicles, is often challenging.

Even if a portion can be sourced from a donor vehicle, it usually requires minor repairs to ensure a proper fit and finish.

By fabricating these sections in-house, we can ensure the highest quality and durability of the repairs. Our skilled artisans meticulously work with new metal to fabricate the necessary panel sections, allowing us to confidently stand behind our warranty for corrosion repairs.

Front Windscreen Aperture – Corners
Front Windscreen Aperture – Upper & Lower Replacement Panels
Toyota HZJ75 – Upper Front Windscreen Repair
Toyota HZJ75 – Lower Front Windscreen Repair

Metal Restoration

There is nothing more satisfying than the result of a metal finished repair.

Prior to the final welding of the metal sections, it is essential to properly fit the panels along with the associated parts.

This is a common repair at our workshop and we also produce custom-made replacement panel sections that are made to order.

Auto Resto

3/345 Victoria Road, Malaga Perth, Western Australia 6090

If you have any questions, let us know.

info@autoresto.com.au

Follow us

Copyrights all rights reserved © Zenzi Pty Ltd 2023

Holden HQ Sedan

Introduction

After serving faithfully for forty-six years, the Holden HQ Sedan, a symbol of automotive heritage, faced significant deterioration due to corrosion. This article delves into the consultation process at Auto Resto, assessment of the corrosion issues, and the tailored proposal to address the concerns presented to the prospective client.

Furthermore, it explores the risks posed and the unintended consequences of substandard repairs. Discover how Auto Resto’s process focuses on identifying the root cause and rebuilding the vehicle’s structure from the inside out.

In the case of this Holden HQ Sedan, consulting with our in-house experts who specialize in classic car restoration is essential. Auto Resto possess the knowledge and experience to evaluate the severity of corrosion issues in the vehicle. By leveraging on our expertise, you can gain valuable insights into the extent of the corrosion damage and make informed decisions about the necessary repairs.

The first step of the process is recognising the visible signs of deterioration and telltale indicators that may point to underlying corrosion issues. Rust spots and unsightly blemishes on the exterior, often serve as an early warning sign. Any paint bubbling, may also signal corrosion lurking beneath the surface.

The condition of the vehicle is assessed and a visual inspection performed to identify visible signs of corrosion damage. The potential risks and safety concerns associated with compromised structure are also noted.

For this Holden HQ Sedan, we identified critical areas like the cowl, A-pillars, floor pans, door hinges, and front windscreen prone to corrosion.

Although unknown to us at this stage, this section of the vehicle had been repaired (by others) on two separate occasions. The substandard repairs (presumably cost efficient), had compounded the problem, driving the corrosion deeper into the vehicle structure and inadvertently increasing our scope of work.

Our process involved exploring the root cause of the corrosion issues and restoring the structure by rebuilding it from the inside out.

RHS Front Windscreen Aperture

The photo below shows the condition of the right-hand side (RHS) of the dash after removing the front windscreen, revealing the extent of the deterioration.

20190327_123705.jpg

Over time, moisture trapped by silicon sealer and cosmetic repairs has penetrated into the metal structure of the dash panel. The damage is extensive, affecting not only the RHS windscreen pillar (aperture) but also the stainless steel windscreen trim fasteners.

The corrosion damage was so advanced that it has even reached the upper areas of the plenum chamber and A-Pillar structure. Which was not initially apparent was that the lower reaches of the plenum chamber have also been affected.

RHS Cowl Panel

In the photo below, the owner-provided RHS replacement cowl panel is being fitted to the vehicle. While aligning the panel with the RHS door and fender, significant alterations were necessary to ensure proper alignment of the stainless steel windscreen trim.

20190331_143107.jpg

Following removing of the external cowl panel section, a substantial amount of debris and corrosion species were exposed. Clearing the debris revealed weakened and perforated panel sections caused by extensive corrosion.

This area forms the underlying structure of the cabin, consisting of multiple layers of overlapping panels. It serves as the juncture point for the RHS A-Pillar, plenum chamber, dash panel, and windscreen cowl panel.

RHS Windscreen Pillar / Door Aperture Section

At first glance, this section appeared relatively solid, but closer inspection revealed hidden issues.

20190404_123757.jpg

In addition to the obvious missing lower section, a previous repairer had bronze-welded a patch on top and filled the void with plastic filler. Originally, this section consists of two layers (upper and lower sections) that form the structure.

Internal Cowl Panel Duct (plenum chamber)

While removing the Internal Cowl Duct, we noticed corrosion embedded in the seal on the underside of the plenum chamber. The area where the cowl duct is fixed is shown in the photograph below. Accessing and repairing this area behind the dash was a  challenge.

20190401_203841.jpg

The only reliable solution to address this issue was to remove the entire external cowl panel, providing access to the plenum chamber. If left unrepaired, water ingress into the vehicle cabin could eventually lead to rusting of the floor pans.

Internal Corrosion Issues

Despite the progress made, there was one more surprise in store for us. The vehicle still had unresolved internal corrosion issues, which required further attention. To see the full video of the work completed, check out the title “Rust Repairs-Holden HQ Sedan.”

Rene Farrace