Introduction
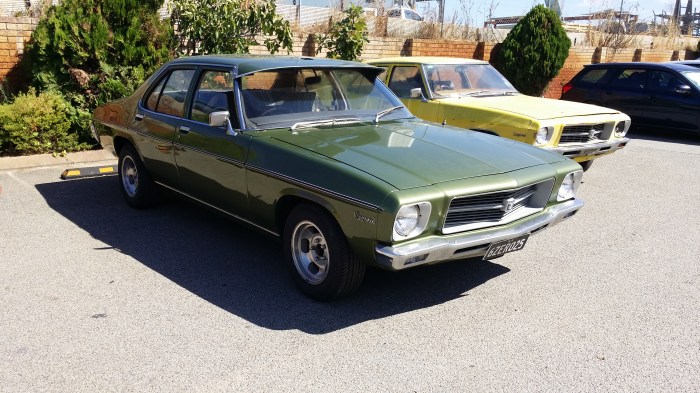
After serving faithfully for forty-six years, the Holden HQ Sedan, a symbol of automotive heritage, faced significant deterioration due to corrosion. This article delves into the consultation process at Auto Resto, assessment of the corrosion issues, and the tailored proposal to address the concerns presented to the prospective client.
Furthermore, it explores the risks posed and the unintended consequences of substandard repairs. Discover how Auto Resto’s process focuses on identifying the root cause and rebuilding the vehicle’s structure from the inside out.
In the case of this Holden HQ Sedan, consulting with our in-house experts who specialize in classic car restoration is essential. Auto Resto possess the knowledge and experience to evaluate the severity of corrosion issues in the vehicle. By leveraging on our expertise, you can gain valuable insights into the extent of the corrosion damage and make informed decisions about the necessary repairs.
The first step of the process is recognising the visible signs of deterioration and telltale indicators that may point to underlying corrosion issues. Rust spots and unsightly blemishes on the exterior, often serve as an early warning sign. Any paint bubbling, may also signal corrosion lurking beneath the surface.
The condition of the vehicle is assessed and a visual inspection performed to identify visible signs of corrosion damage. The potential risks and safety concerns associated with compromised structure are also noted.
For this Holden HQ Sedan, we identified critical areas like the cowl, A-pillars, floor pans, door hinges, and front windscreen prone to corrosion.
Although unknown to us at this stage, this section of the vehicle had been repaired (by others) on two separate occasions. The substandard repairs (presumably cost efficient), had compounded the problem, driving the corrosion deeper into the vehicle structure and inadvertently increasing our scope of work.
Our process involved exploring the root cause of the corrosion issues and restoring the structure by rebuilding it from the inside out.
RHS Front Windscreen Aperture
The photo below shows the condition of the right-hand side (RHS) of the dash after removing the front windscreen, revealing the extent of the deterioration.
Over time, moisture trapped by silicon sealer and cosmetic repairs has penetrated into the metal structure of the dash panel. The damage is extensive, affecting not only the RHS windscreen pillar (aperture) but also the stainless steel windscreen trim fasteners.
The corrosion damage was so advanced that it has even reached the upper areas of the plenum chamber and A-Pillar structure. Which was not initially apparent was that the lower reaches of the plenum chamber have also been affected.
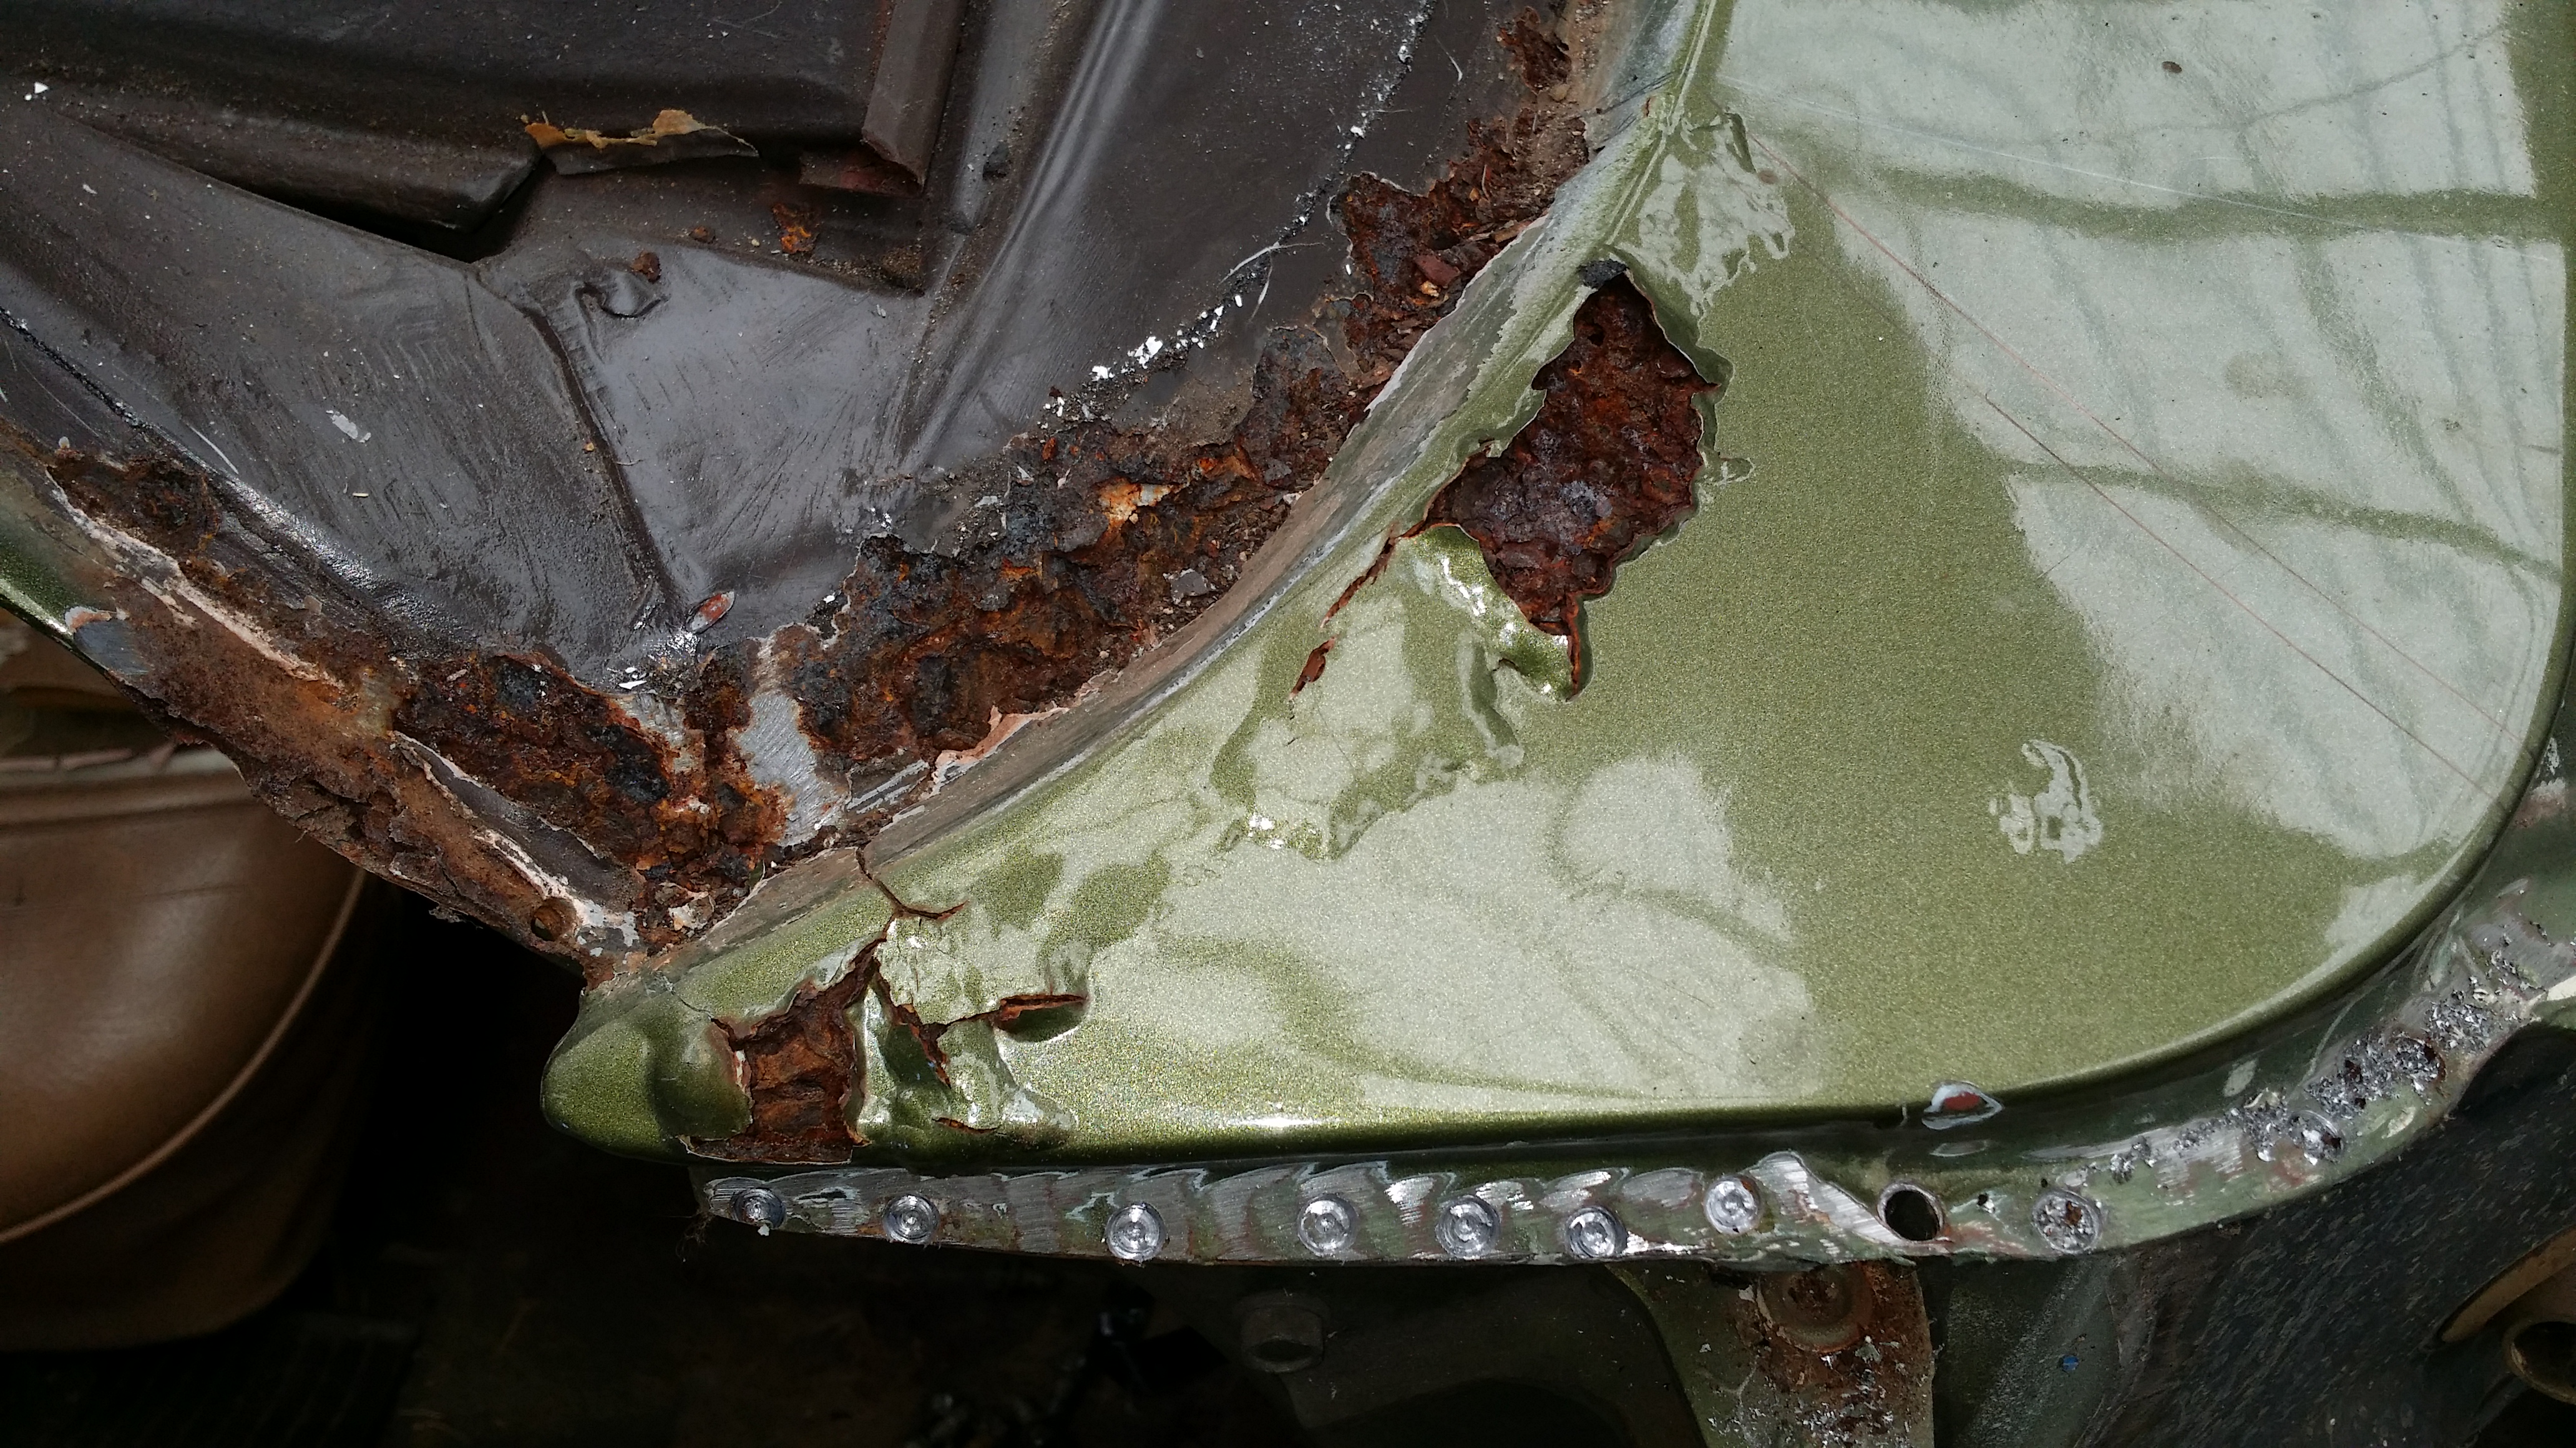
RHS Cowl Panel
In the photo below, the owner-provided RHS replacement cowl panel is being fitted to the vehicle. While aligning the panel with the RHS door and fender, significant alterations were necessary to ensure proper alignment of the stainless steel windscreen trim.
Following removing of the external cowl panel section, a substantial amount of debris and corrosion species were exposed. Clearing the debris revealed weakened and perforated panel sections caused by extensive corrosion.


This area forms the underlying structure of the cabin, consisting of multiple layers of overlapping panels. It serves as the juncture point for the RHS A-Pillar, plenum chamber, dash panel, and windscreen cowl panel.
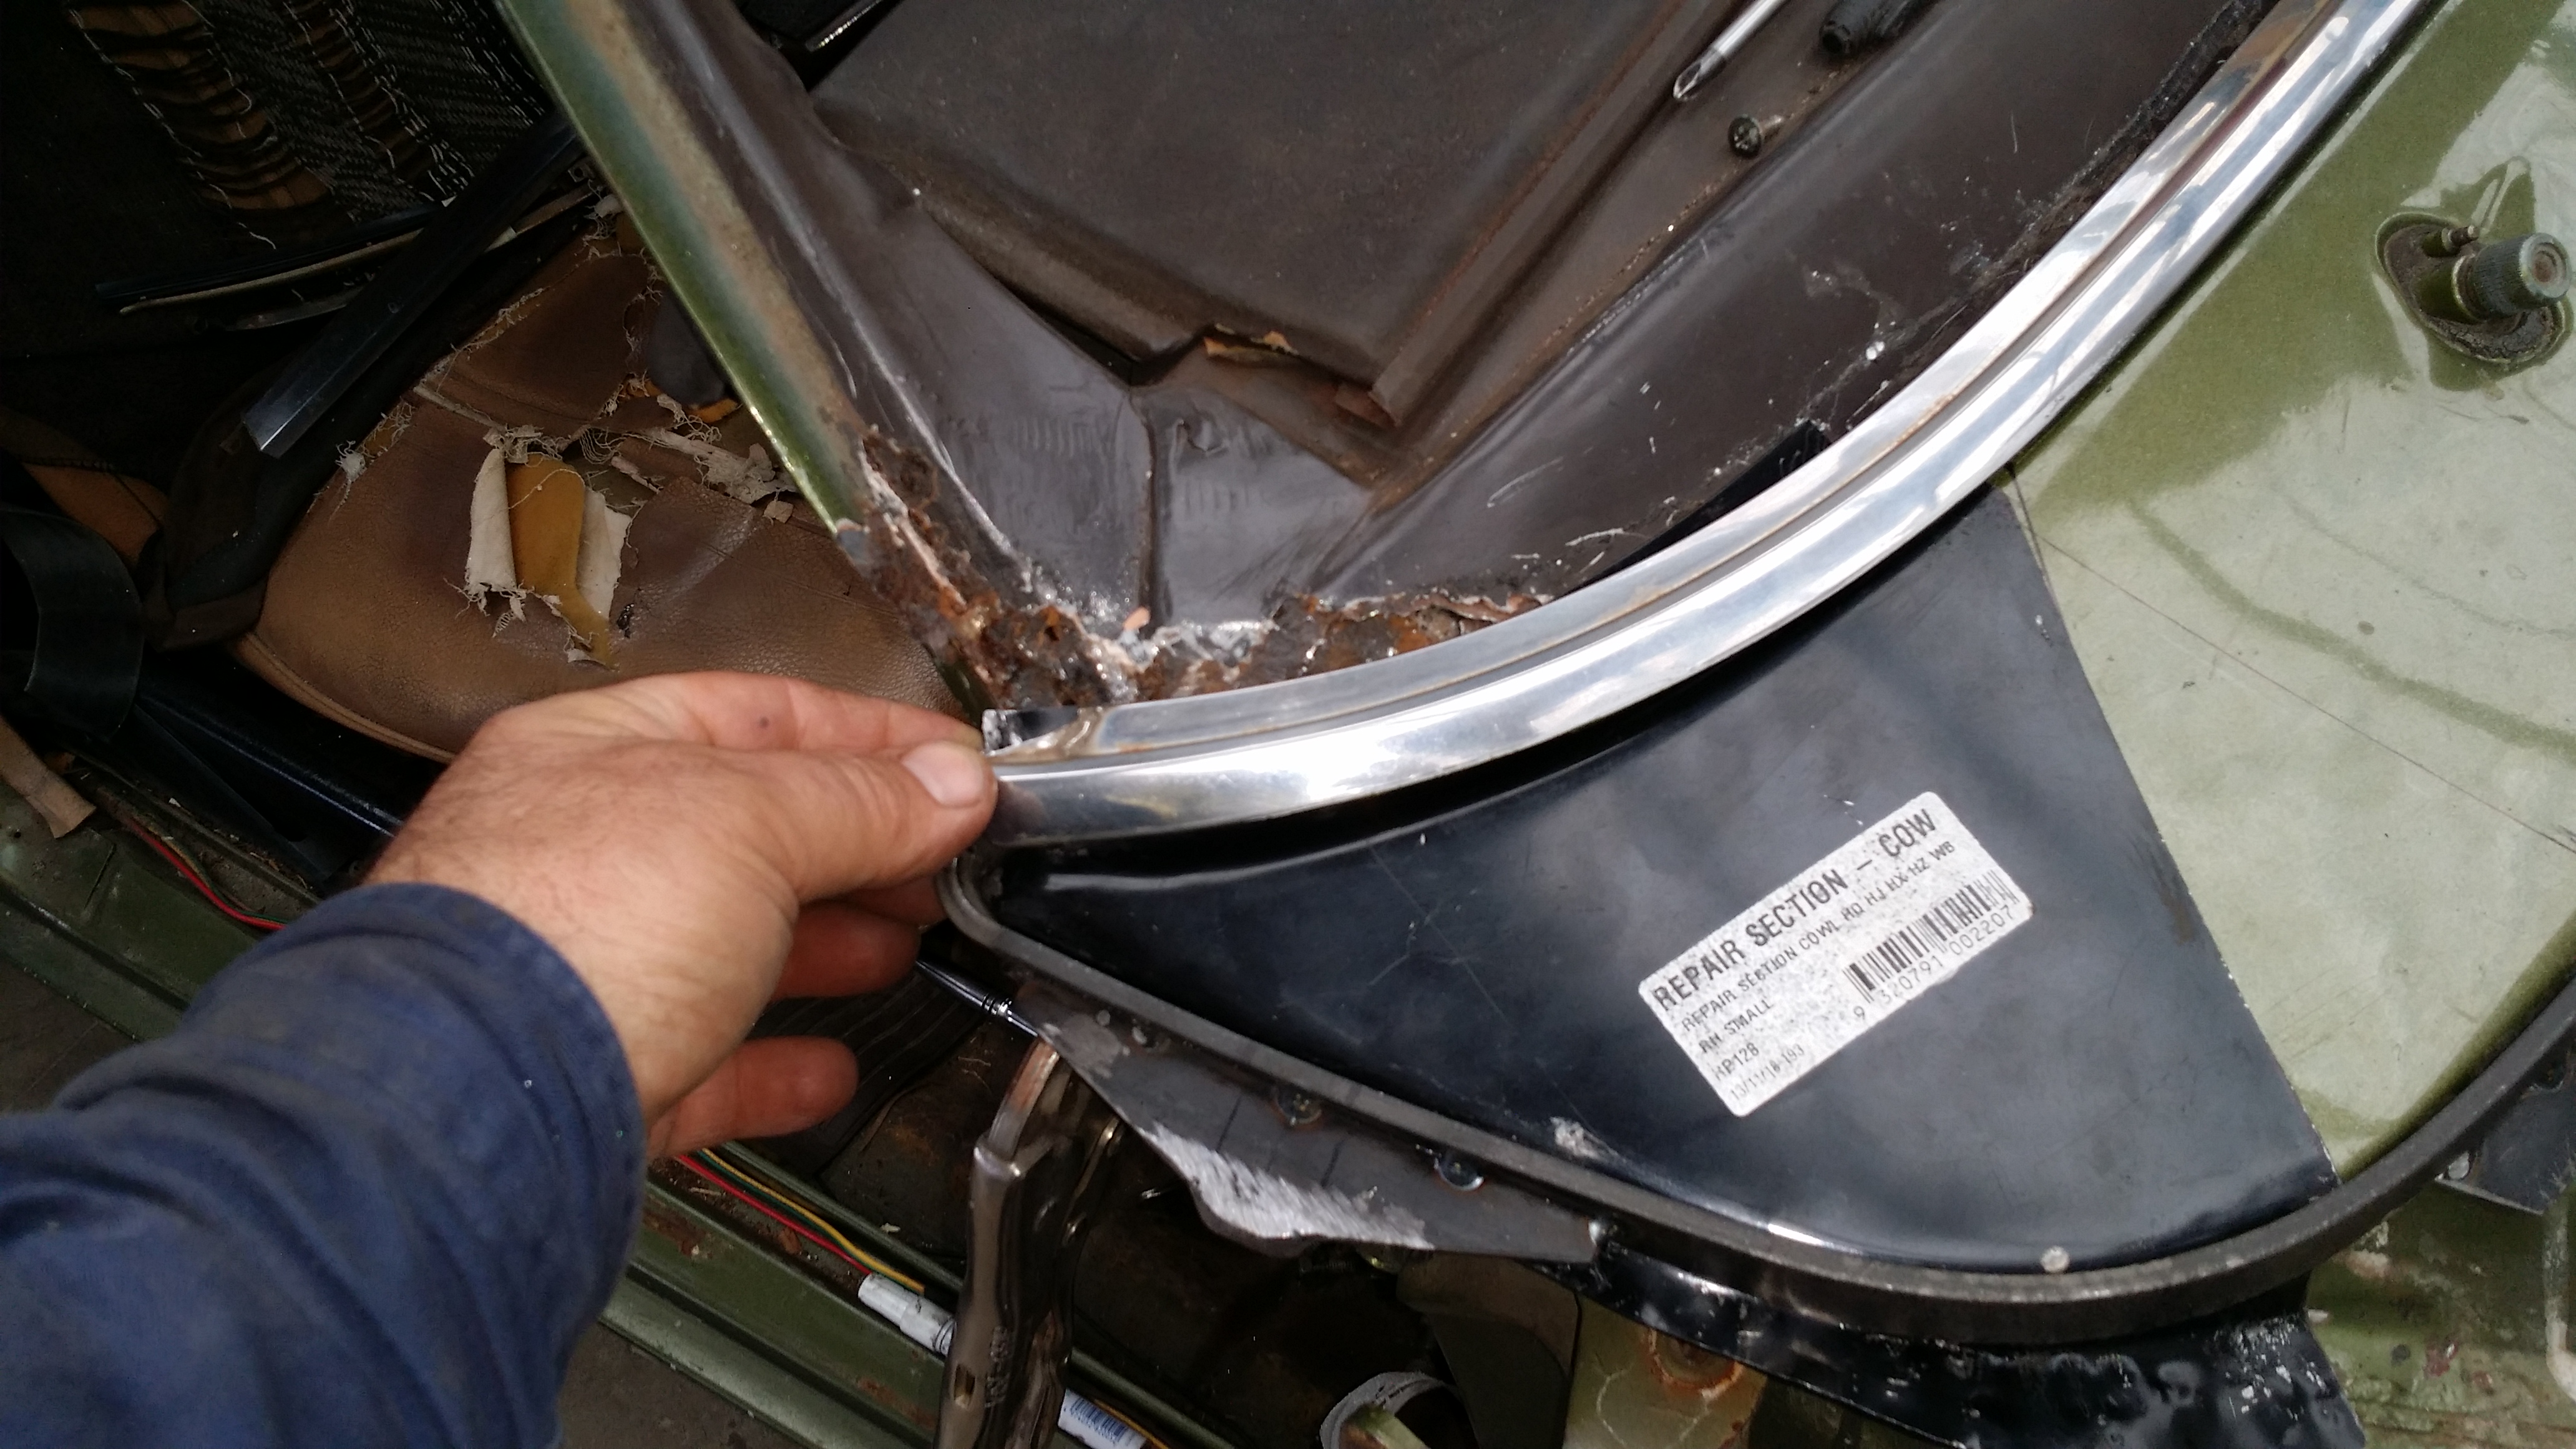
RHS Windscreen Pillar / Door Aperture Section
At first glance, this section appeared relatively solid, but closer inspection revealed hidden issues.
In addition to the obvious missing lower section, a previous repairer had bronze-welded a patch on top and filled the void with plastic filler. Originally, this section consists of two layers (upper and lower sections) that form the structure.
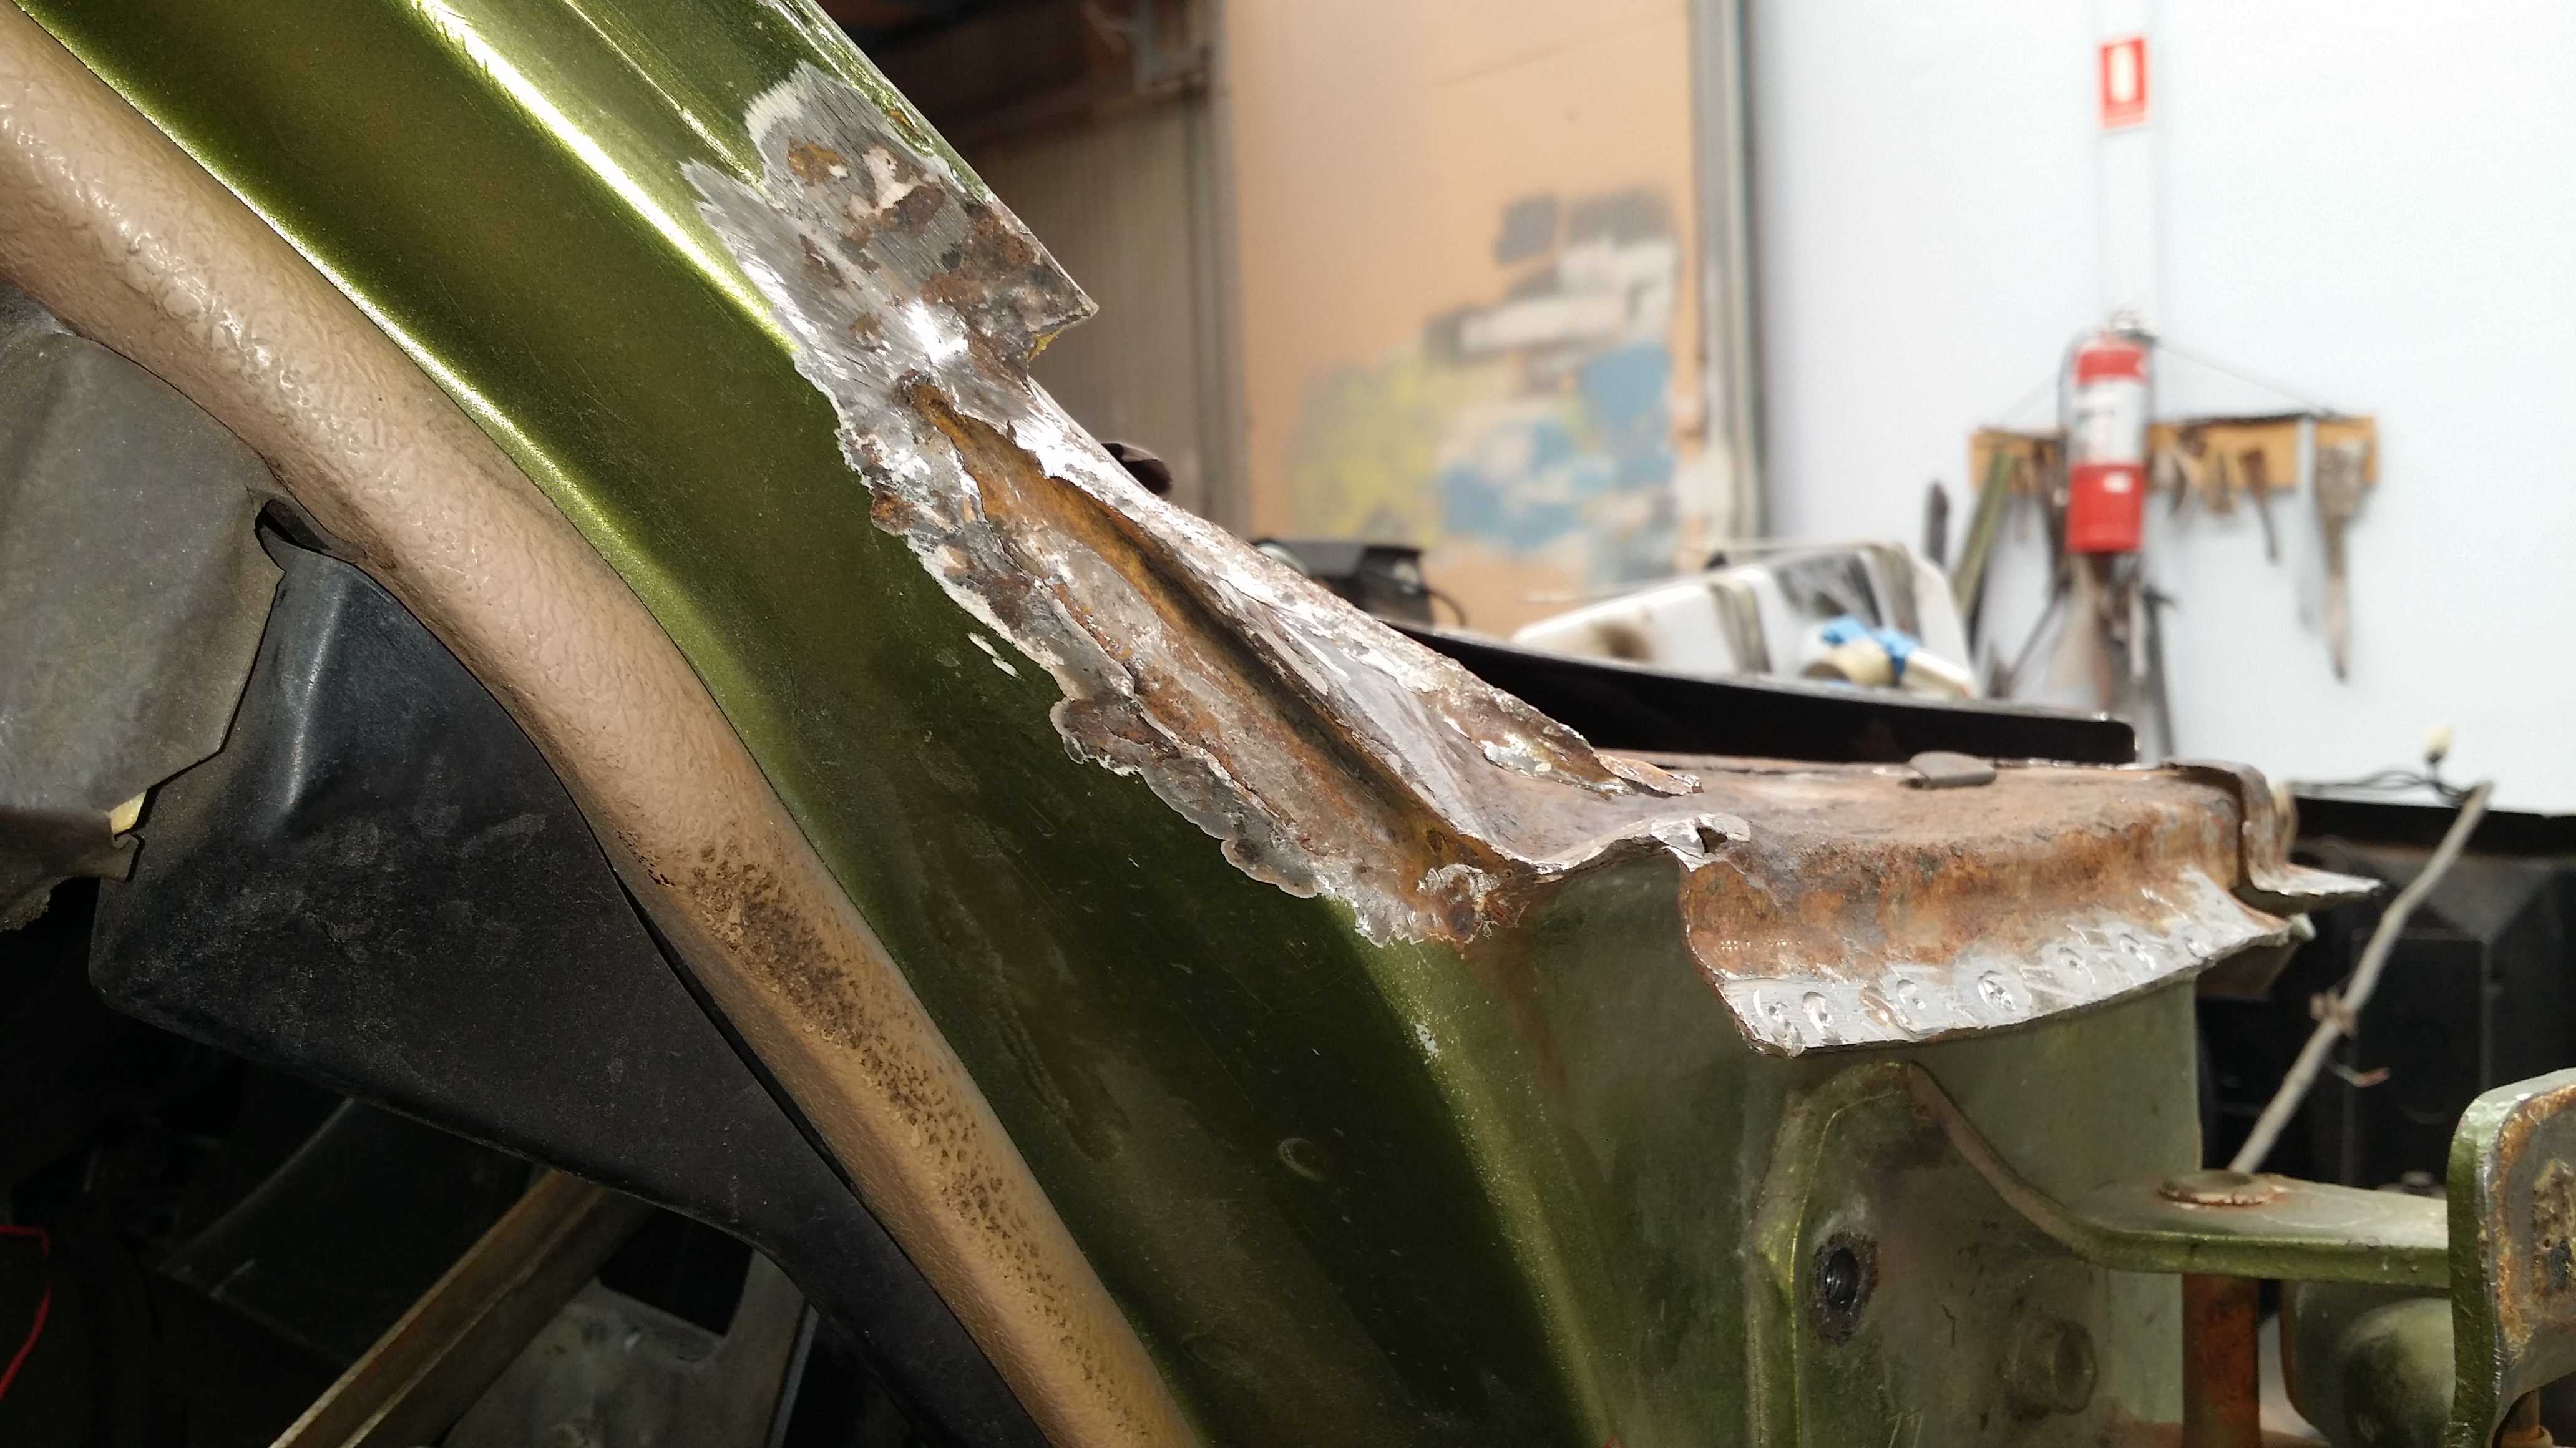
Internal Cowl Panel Duct (plenum chamber)
While removing the Internal Cowl Duct, we noticed corrosion embedded in the seal on the underside of the plenum chamber. The area where the cowl duct is fixed is shown in the photograph below. Accessing and repairing this area behind the dash was a challenge.

The only reliable solution to address this issue was to remove the entire external cowl panel, providing access to the plenum chamber. If left unrepaired, water ingress into the vehicle cabin could eventually lead to rusting of the floor pans.
Internal Corrosion Issues
Despite the progress made, there was one more surprise in store for us. The vehicle still had unresolved internal corrosion issues, which required further attention. To see the full video of the work completed, check out the title “Rust Repairs-Holden HQ Sedan.”
Rene Farrace
