1976 Morgan 4/4 Roadster

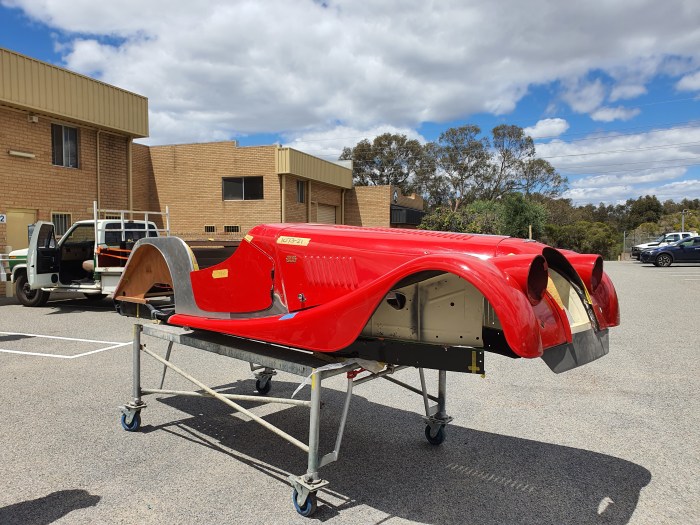
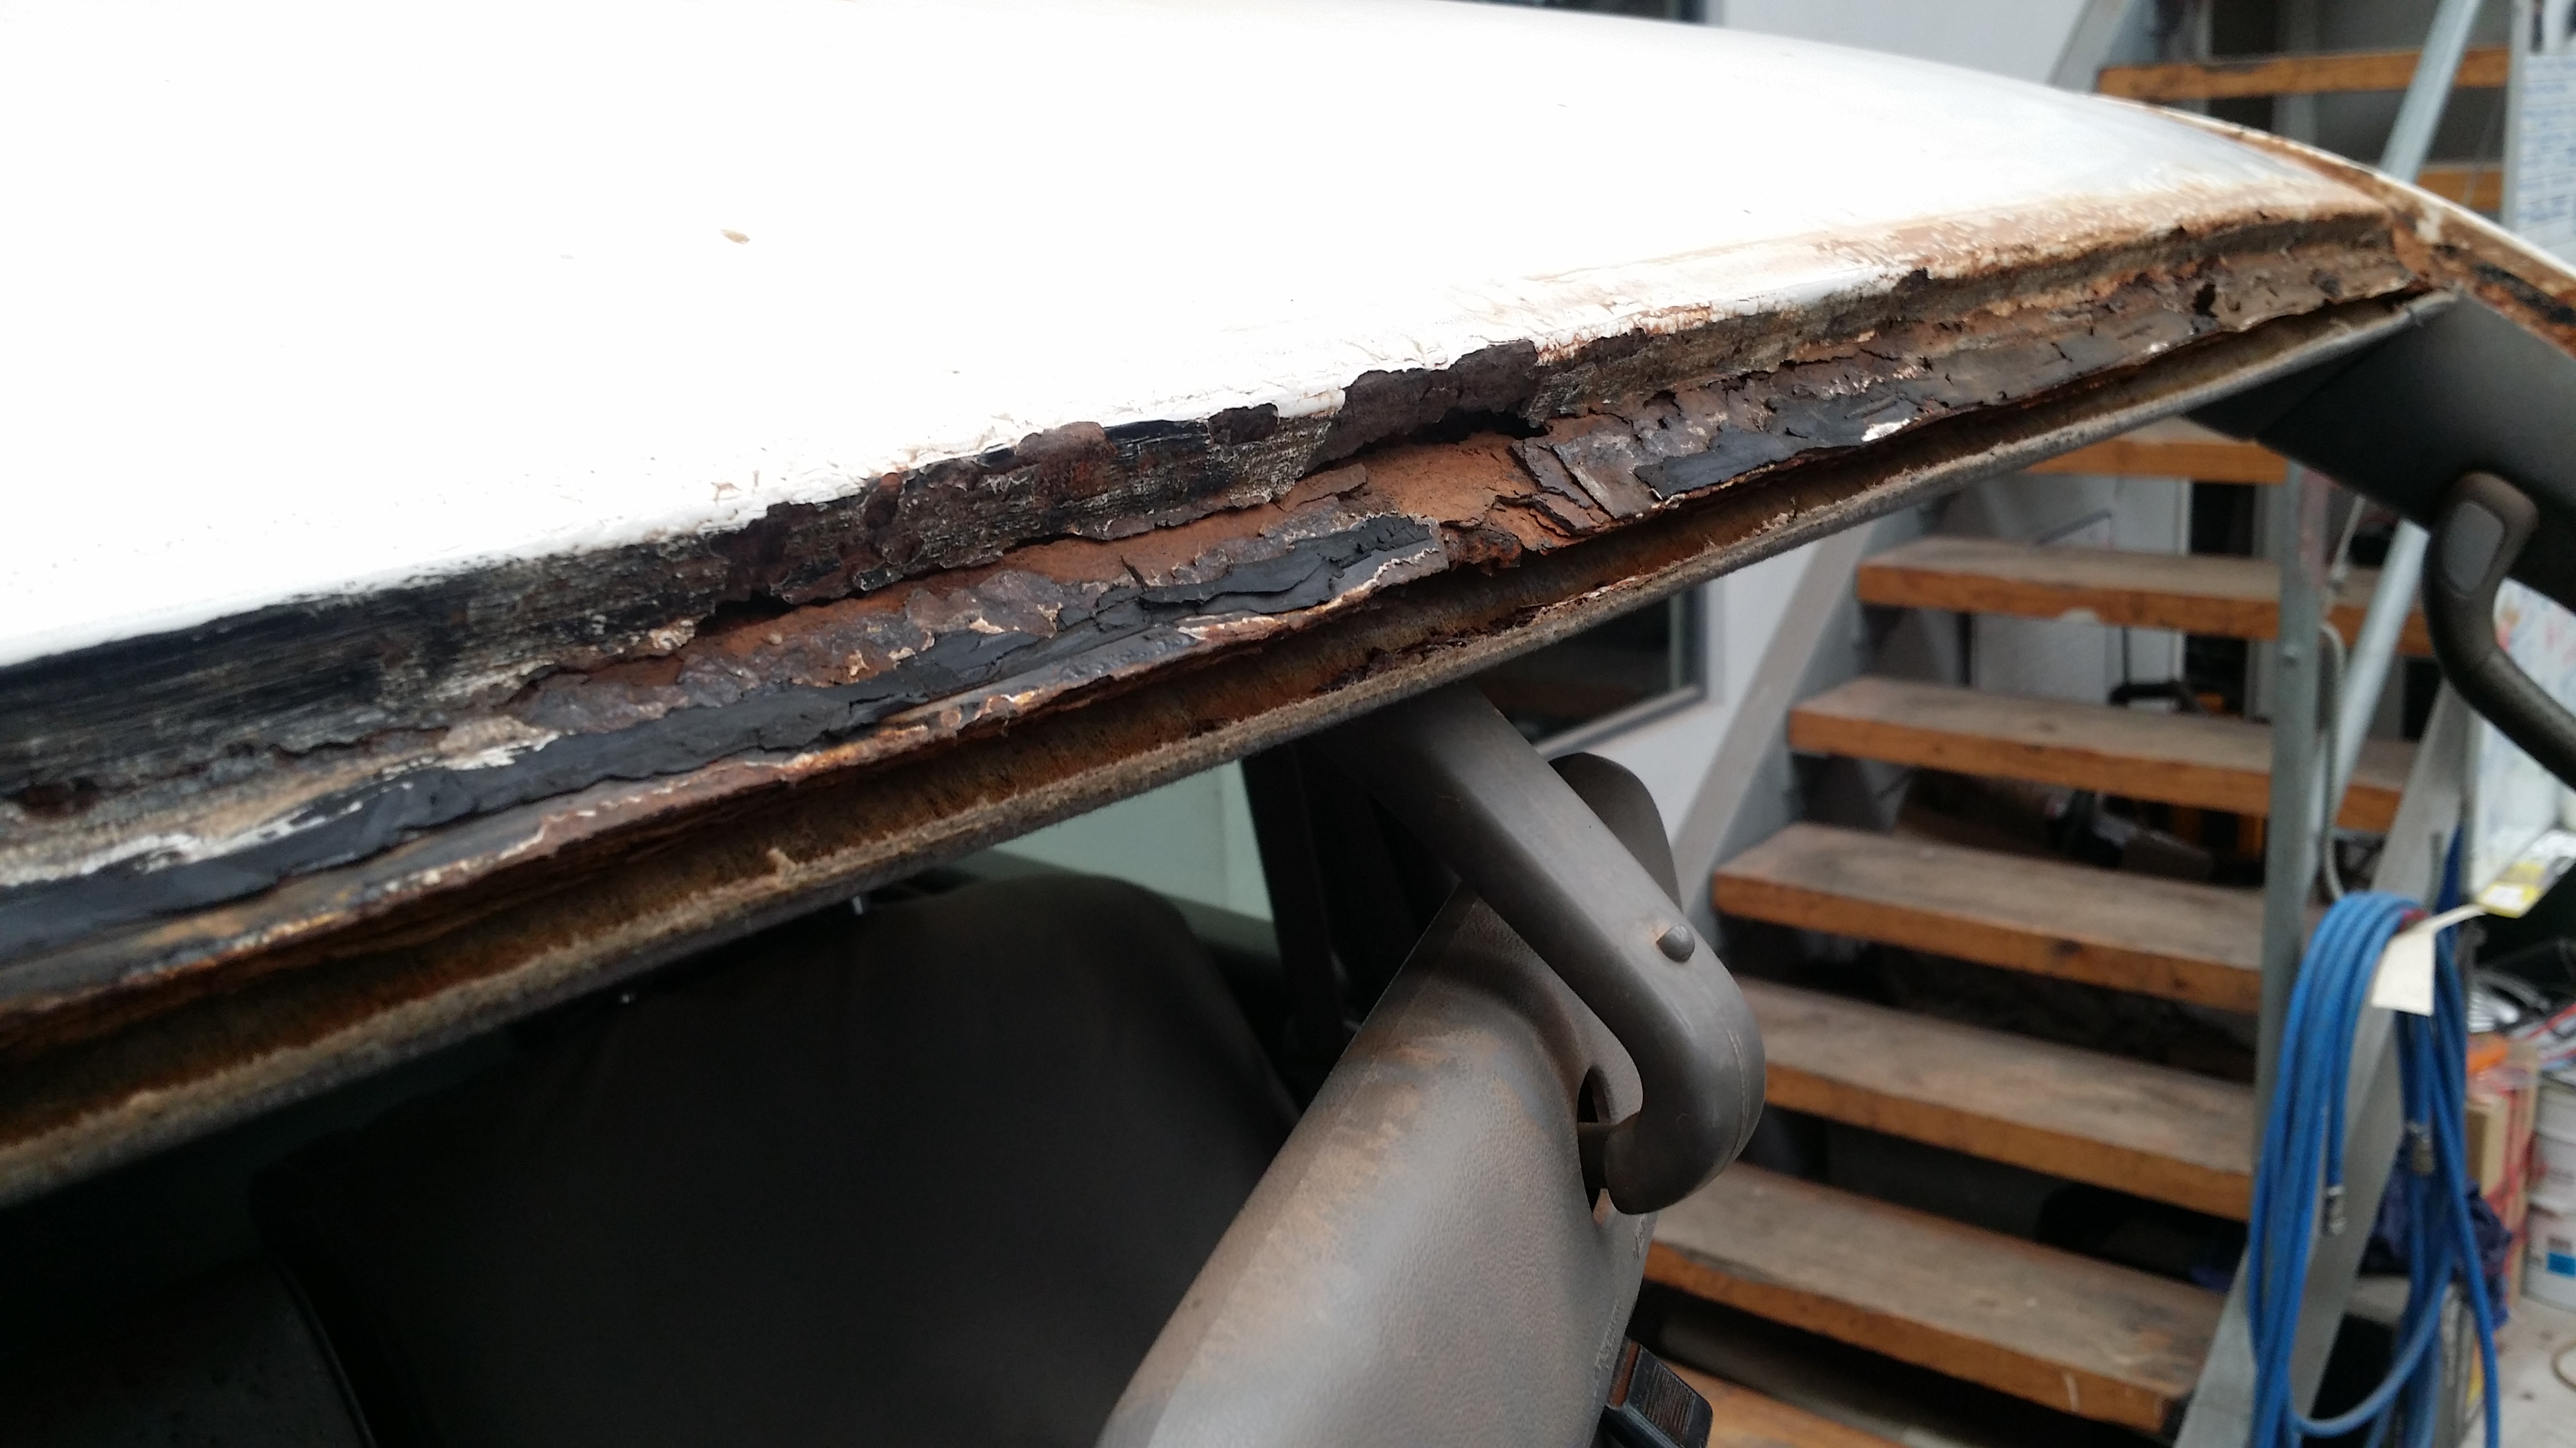
When I began my traineeship as an artisan coach builder, I had the privilege of working on classic vehicles like the Morgan 4/4 Roadster.

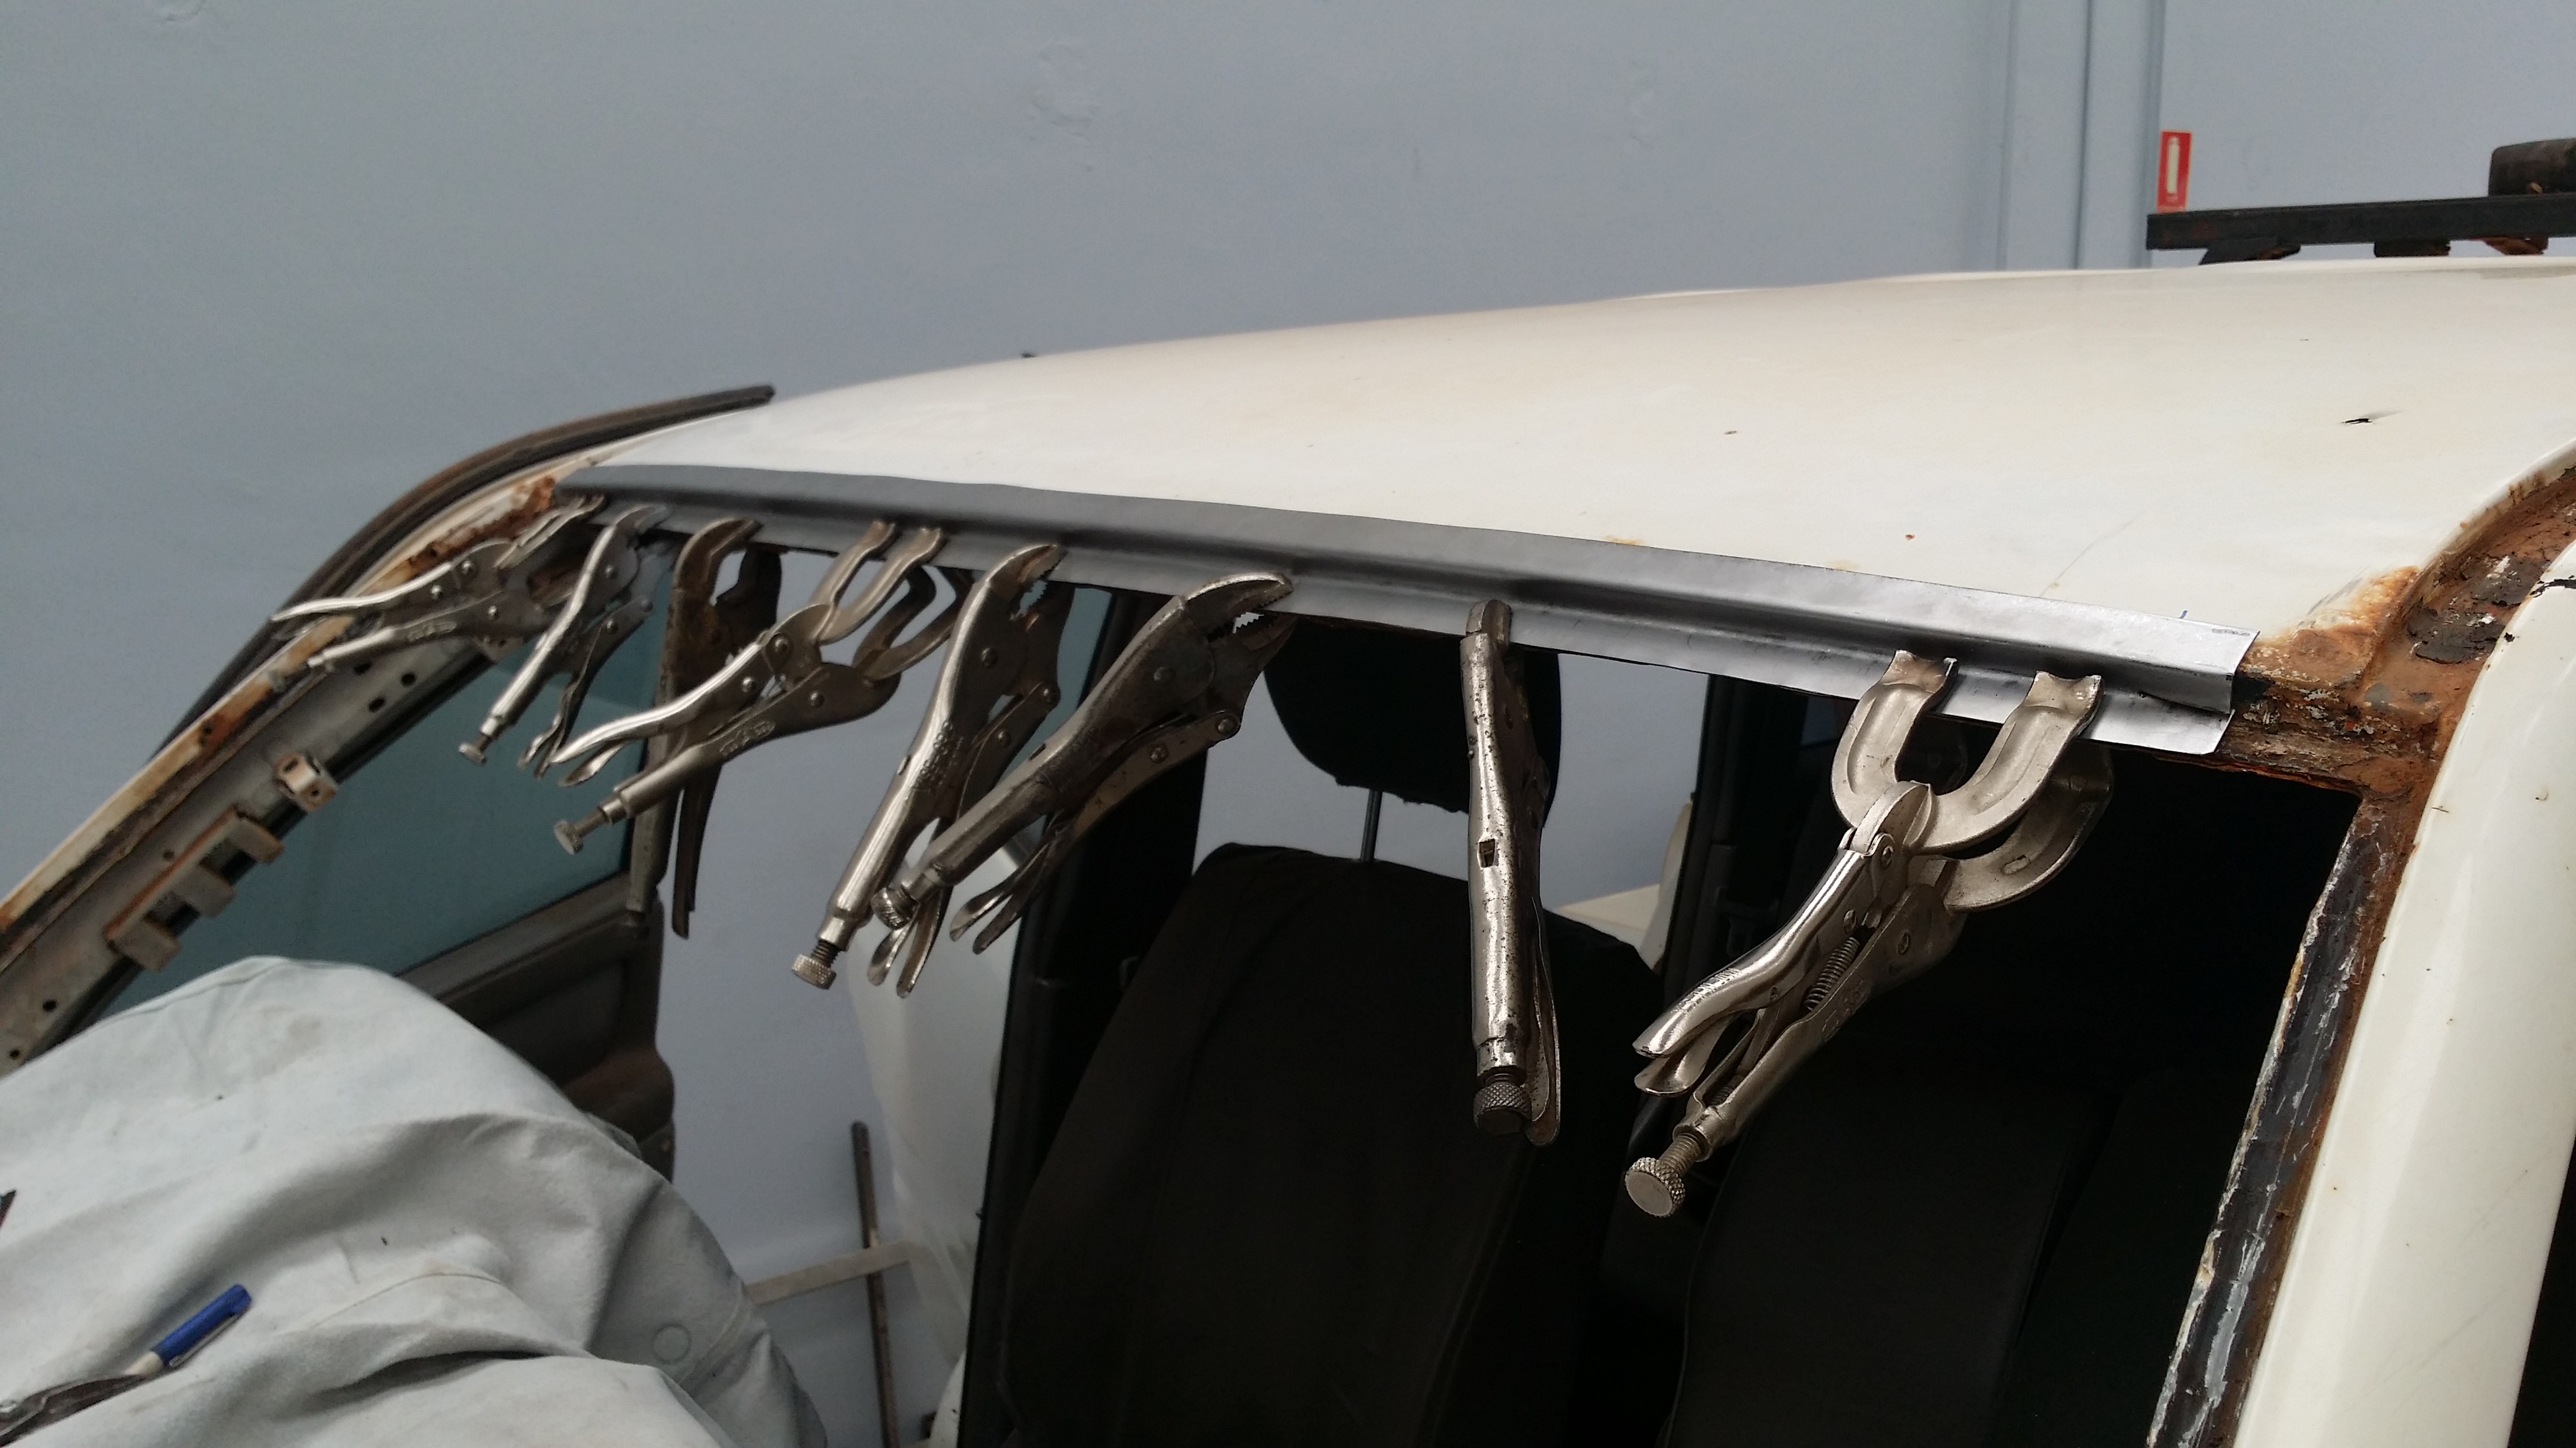
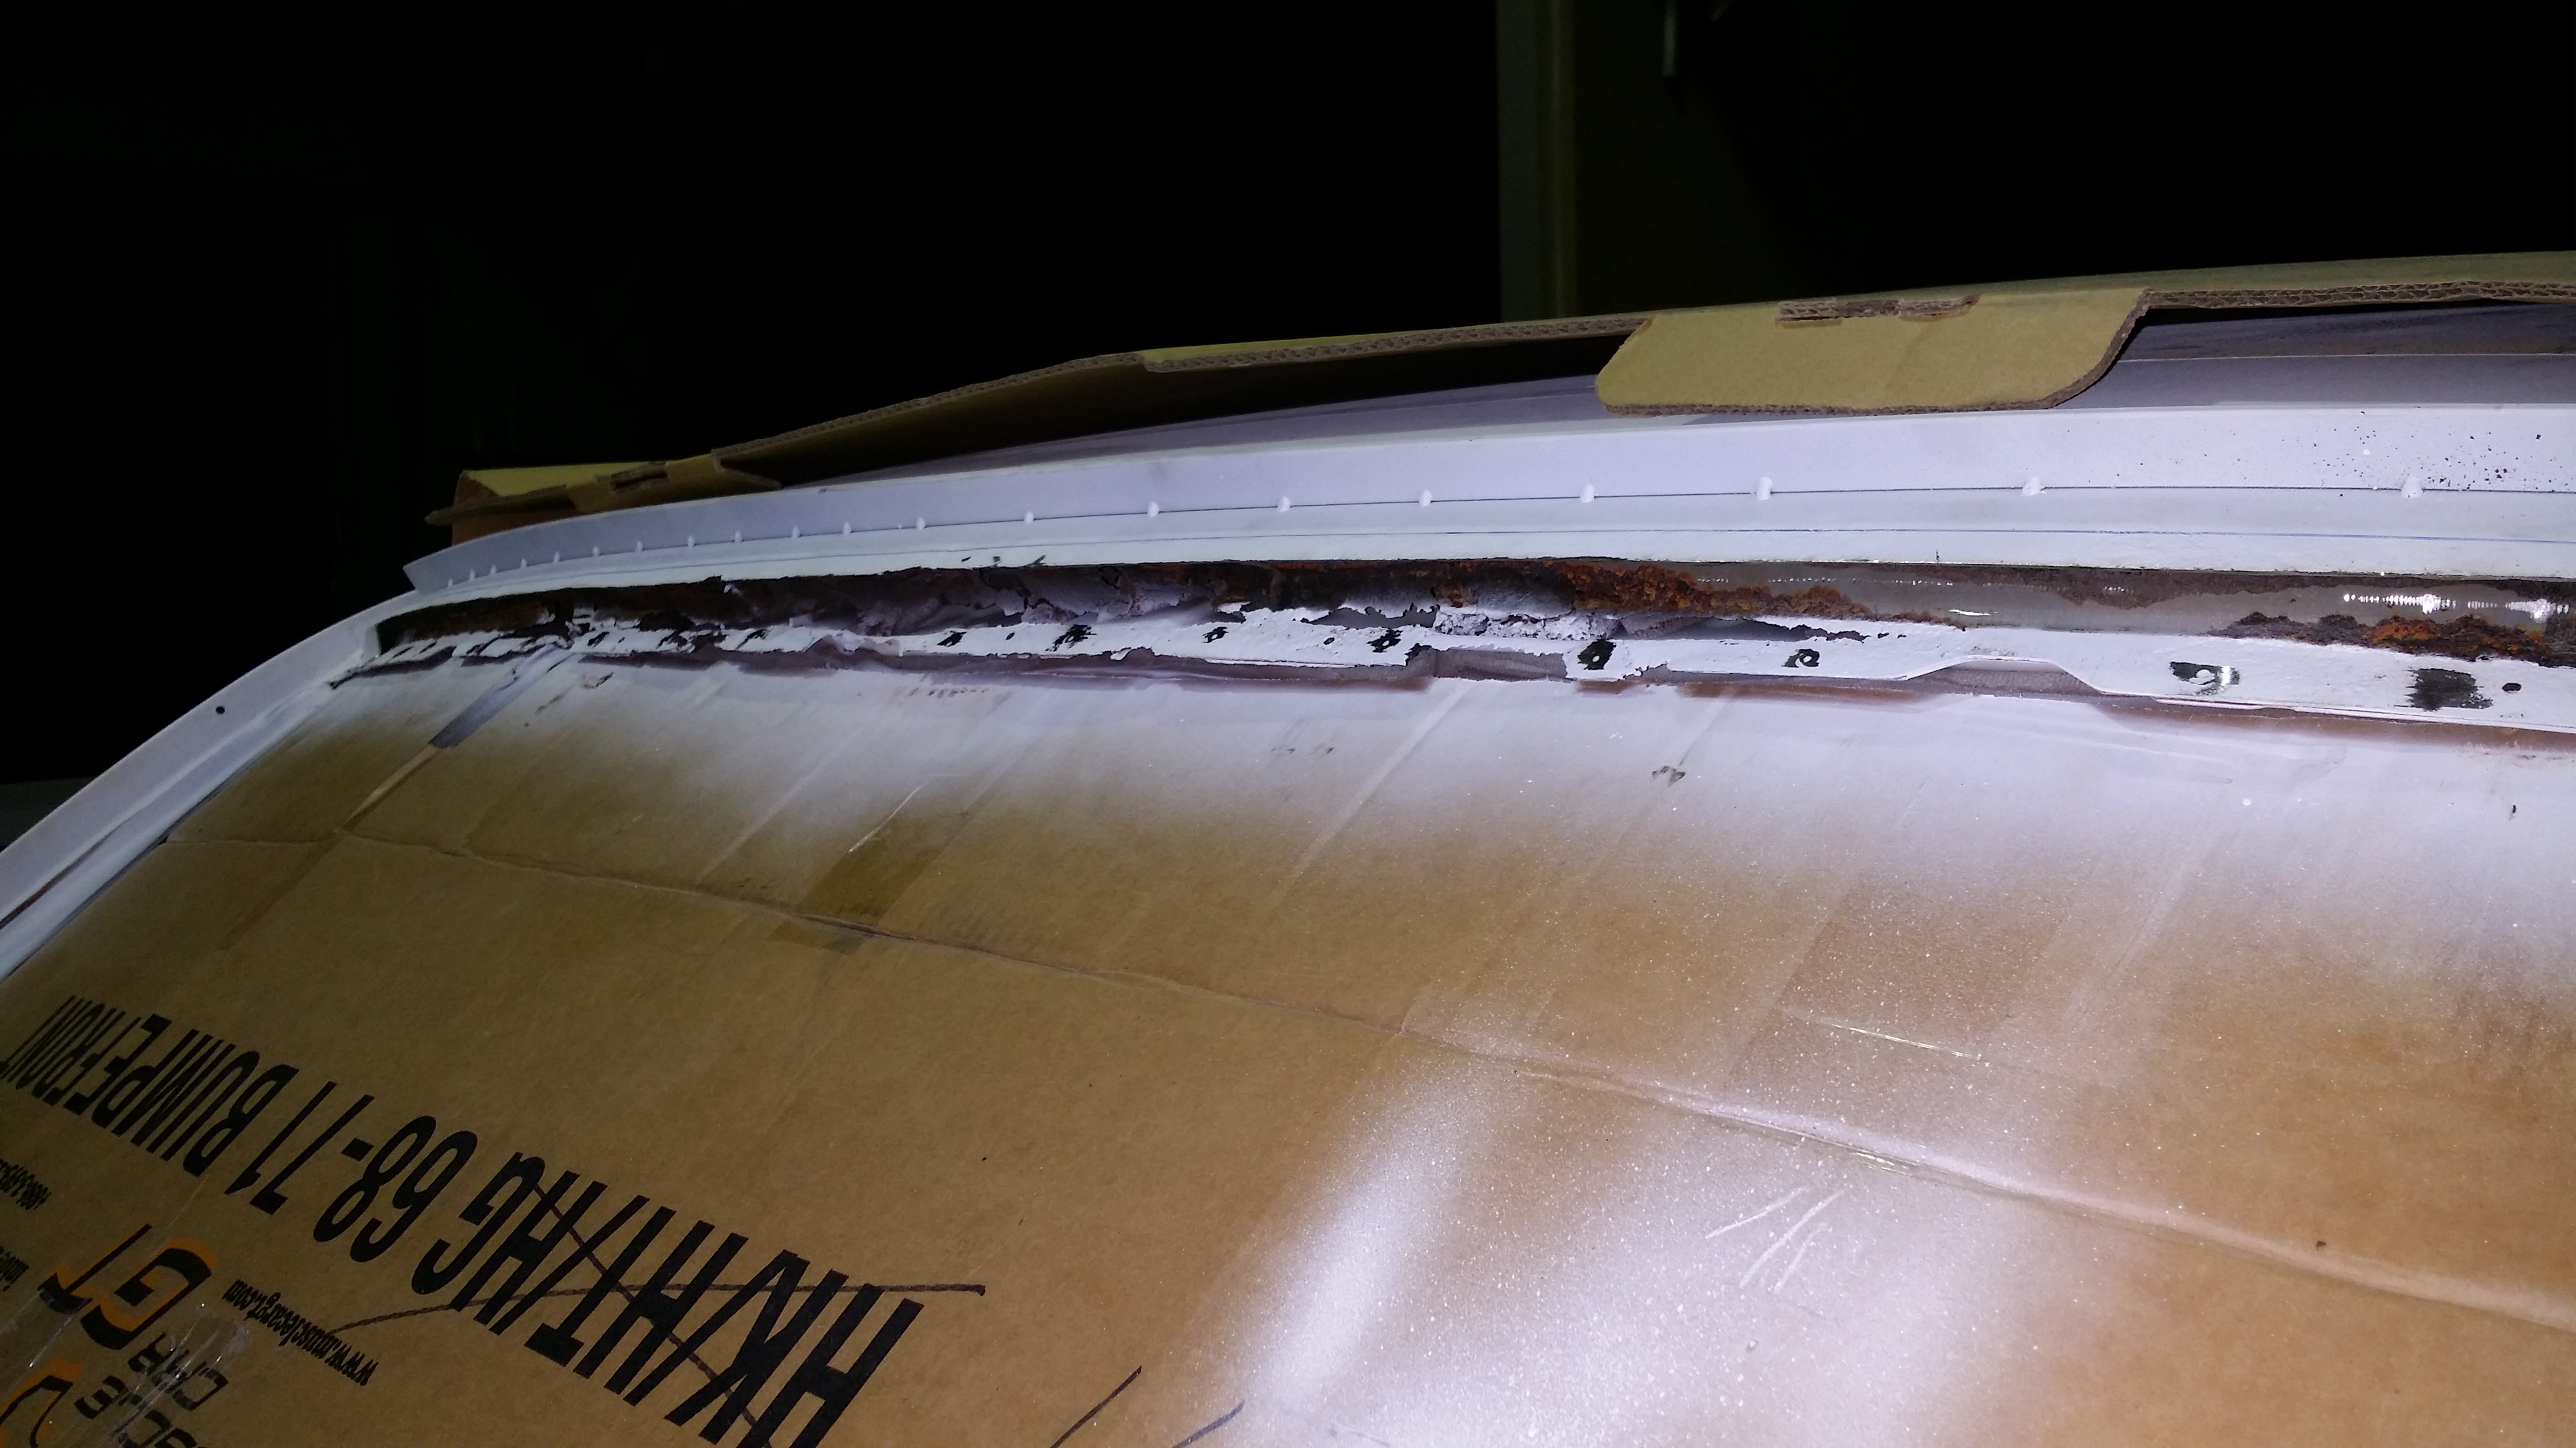
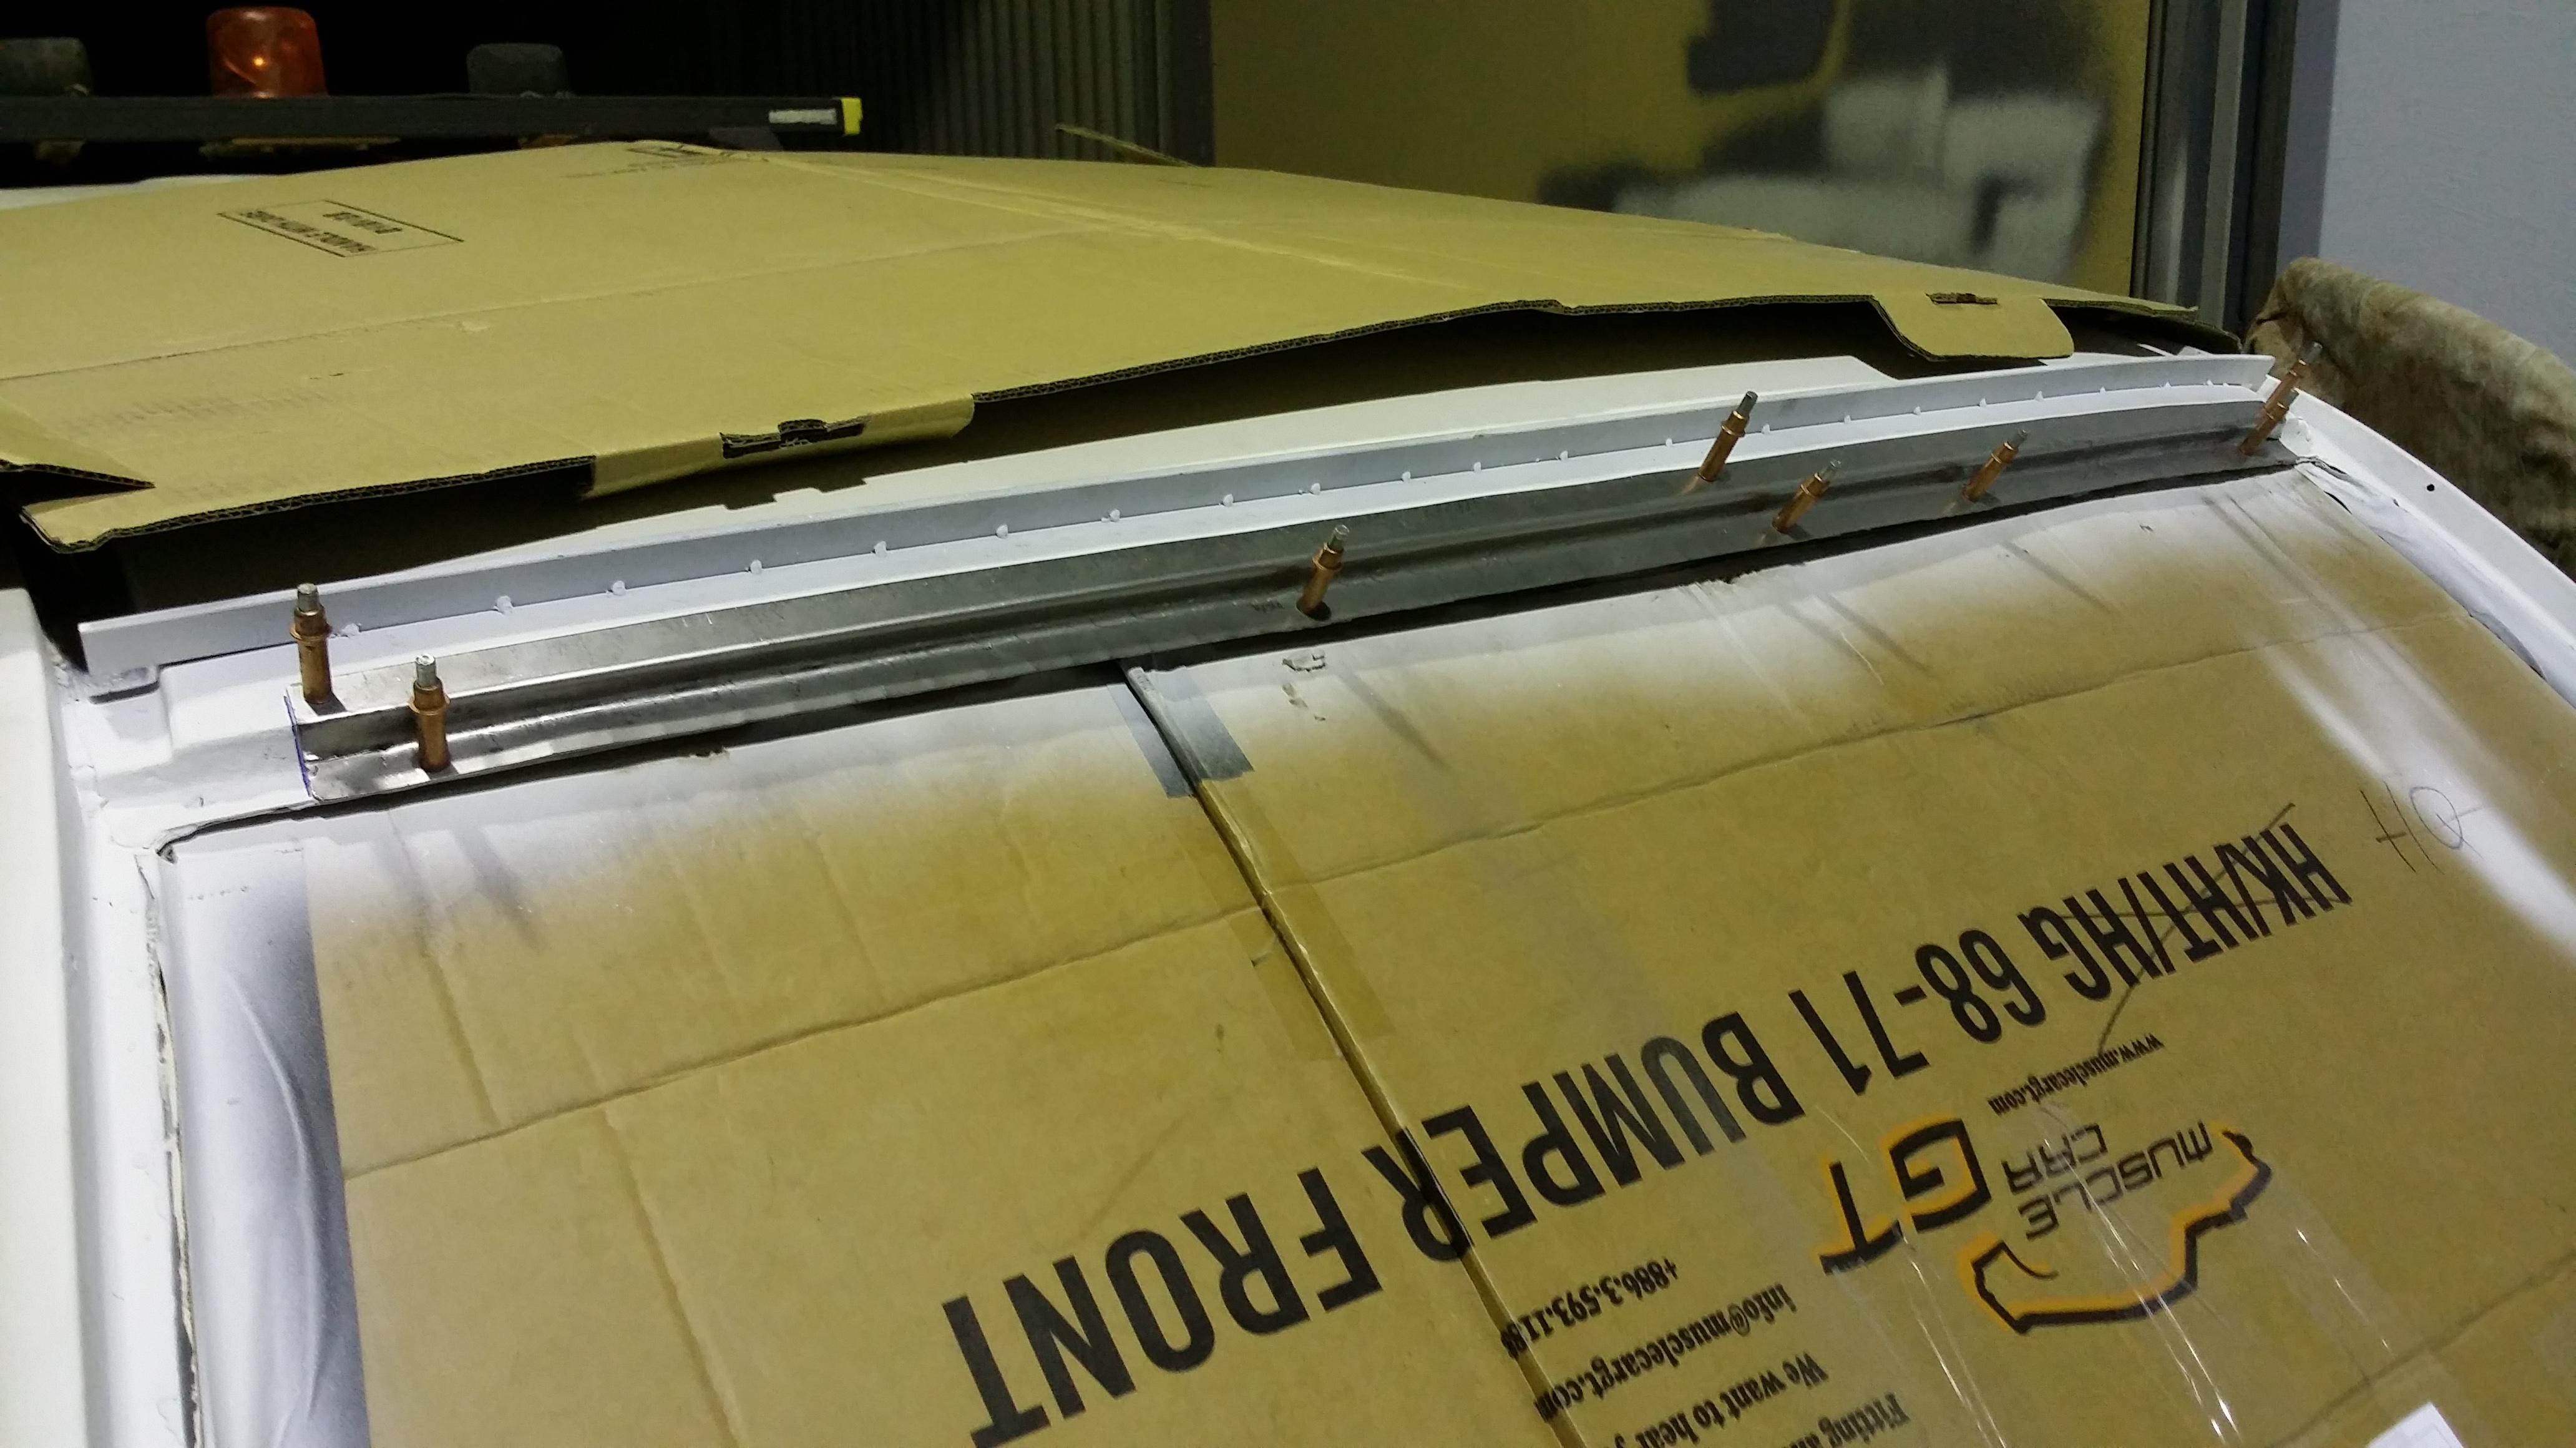
Morgan – body & Panel repairs

One of the first steps in the repair process involved squaring and securing the timber body frame to the chassis. Then, the body panels were fitted to ensure proper alignment and functionality.

Body Frame Alignment

The vehicle was initially delivered without any attached parts, exposing the timber frame.

Body Panel Alignment

We fitted the rear quarter panel to determine the extent of the sill panel and the position of the rebate joint.

Panel Fabrication

Before commencement of repairs, we also trial fitted the lower section of the front cowl panel. Subsequently, we fabricated the sill panel section and integrated it with the front cowl panel.

Timber Rebate – Sill Panel

To ensure a seamless integration, we notched the timber body frame to allow for the smooth connection of the quarter panel and sill panel section.

Sill Panel Rebate

The quarter panel section was stepped to create a rebate that would overlap with the cowl panel (sill panel section) and provide a flush finish.

Sill Panel – Interface Joint

The finished joint between the cowl panel and the quarter panel (sill panel sections), as originally manufactured by Morgan.

Timber Rebate – Dovetail Section

We repeated the process by notching the timber body frame at the dovetail end to ensure the smooth integration of the quarter panel and dovetail panel.

Quarter Panel Rebate

The rear section of the quarter panel section was also stepped to create a rebate for the dovetail panel, resulting in a flush joint between the two sections.

Dovetail – Interface Joint

The finished joint between the dovetail section and the quarter panel.

Morgan – panel alignment

Once the repairs were complete, we performed a post fitment and alignment of the body panels on the Morgan. This step was crucial before proceeding with painting as it ensured uniform separation between the panels, eliminating the risk of binding or scuffing with adjacent panel sections.

Timber Frame Alterations

Before fitting and aligning the reproduction quarter panels, we made necessary alterations to the timber frame.

Front Panels

During the fitting of the front panels, we tweaked and laser-leveled the chassis to achieve improved gaps and alignment.

Front Fender

We carefully fitted and adjusted the fenders to ensure a consistent gap between adjacent panels.

Rear Quarter Panel

The rear quarter panels were installed along with the doors, and their contour was manipulated to create a uniform seal.

Rear Dovetail

We also manipulated the rear dovetail panel to fit the new timber frame.

Vehicle Body & Parts

The final result was a well-finished vehicle body with uniform gaps, achieved without forcing the parts into position.

Morgan – Repair Panels

Fortunately, for this particular vehicle, we had a limited number of repair panels to fabricate as the owner provided aftermarket quarter panels.

Cowl Panel – Sill Panel Sections

The new sill panel sections fabricated in house.

Front Valance Panel

Front valance panel was fabricated in house with a stainless steel wired edge.

New Quarter Panels – Supplied

Fortunately the customer was able to source the new fabricated quarter panels from the UK.

Morgan – Bespoke Panel Fabrication

When the vehicle initially came to us, it was missing two important panel sections—the front and rear valance panels. Upon its return, after having the mechanical items reinstalled, we fabricated and installed a bespoke center console.

Front Valance Panel

The Morgan did not have a front valance panel originally, but the owner wanted to add front lights without compromising the aesthetic. To achieve this, we replicated the design of the rear and fabricated a custom front valance panel.

Rear Valance Panel

For the rear valance panel, we used 1mm steel plate and reinforced the edge with wire encasement.

Bespoke Centre Console

Designing the center console was a meticulous task, considering the limited space available for the seats and the operation of the pedal assembly. We carefully crafted a center console that met these precise requirements.

Auto Resto

3/345 Victoria Road, Malaga Perth, Western Australia 6090

If you have any questions, let us know.

info@autoresto.com.au

Follow us

Copyrights all rights reserved © Zenzi Pty Ltd 2023

Toyota HZJ75 Landcruiser

Despite Toyota’s efforts to improve their past models, the relentless corrosion continues to wreak havoc on these seemingly indestructible vehicles. This particular vehicle has endured a tough life, and the signs of neglect are unmistakable. At Auto Resto, we rarely decline projects, so we gladly accepted this challenge.

At Auto Resto, we accept the challenges that others decline.

Turret aperture

The corrosion damage around the front windscreen aperture was so severe that we needed to fabricate an entire new turret centre section and each of the turret corners to complete the repair.

Additionally, the internal turret reinforcement section was replaced.

Our highly skilled artisans crafted all the panels shown here in-house.

LHS Turret Corner – Corrosion Damage
LHS Turret Corner – Panel Fabrication
RHS Bulkhead Corner – Corrosion Damage
RHS Bulkhead Corner – Panel Fabrication

Bulkhead Aperture

The corrosion damage to the bulkhead section was further complicated by the extensive corrosion found in the A-Pillar sections, the bulkhead reinforcement, and behind the dash panel instruments.

To ensure safety during the repairs, the cabin interior and dash panel instruments were removed to eliminate the potential risk of fire.

The fabricated panel sections illustrated here were just the beginning, as further repairs were still required.

LHS Turret frame

While repairing the left-hand side (LHS) turret corner, it was discovered that the frame had been weakened by corrosion.

The turret frame, which is integral to the door frame aperture, had to be repaired with a new section. The turret frame, which plays a crucial role in the door frame aperture, required repair. A new section was fabricated to replace the damaged portion which was subsequently cut out and replaced.

The repair of the frame’s top corner was successfully completed before proceeding with fabrication of the drip rail panel.

LHS Turret Frame – Corrosion
LHS Turret Frame – Repair
LHS A-Pillar Drip Rail – Repair
LHS A-Pillar Drip Rail – Panel Fabrication

Pillar Drip rail

During the repair of the LHS turret corner and frame, it was necessary to remove the drip rail (gutter) section. It was discovered that the drip rail had suffered extensive corrosion along its entire length, resulting in weakened structural integrity.

To address this issue, a new drip rail panel section was fabricated and carefully shaped to fit the vehicle.

A-Pillar Section

The lower section of the A-pillars displayed visible corrosion damage, which is typically caused by water ingress originating from the turret section.

The A-pillar is made up of overlapping panel sections, which forms to provide the overall structural strength and rigidity of the vehicle.

LHS A-Pillar – External Corrosion Damage
LHS A-Pillar – Internal Corrosion
LHS A-Pillar – Corrosion Cleaning
LHS Door Aperture – Corrosion Cleaning

cleaning process

At Auto Resto, every repair is performed with great attention to detail, and one crucial aspect is ensuring that the surface is thoroughly prepared and cleaned to eliminate any corrosion contaminants.

To achieve a high-quality finish that meets the Australian Standards AS 1627.4—2005 for metal finishing and surface pre-treatment, we employ a combination of processes and techniques. These methods ensure that the repaired surface meets the required standards for durability.

Our approach also includes multi-staged pre and post coating treatments.

Panel fabrication

At Auto Resto, metal fabrication is a crucial part of most projects. Finding ready-made replacement panel sections, even for modern vehicles, is often challenging.

Even if a portion can be sourced from a donor vehicle, it usually requires minor repairs to ensure a proper fit and finish.

By fabricating these sections in-house, we can ensure the highest quality and durability of the repairs. Our skilled artisans meticulously work with new metal to fabricate the necessary panel sections, allowing us to confidently stand behind our warranty for corrosion repairs.

Front Windscreen Aperture – Corners
Front Windscreen Aperture – Upper & Lower Replacement Panels
Toyota HZJ75 – Upper Front Windscreen Repair
Toyota HZJ75 – Lower Front Windscreen Repair

Metal Restoration

There is nothing more satisfying than the result of a metal finished repair.

Prior to the final welding of the metal sections, it is essential to properly fit the panels along with the associated parts.

This is a common repair at our workshop and we also produce custom-made replacement panel sections that are made to order.

Auto Resto

3/345 Victoria Road, Malaga Perth, Western Australia 6090

If you have any questions, let us know.

info@autoresto.com.au

Follow us

Copyrights all rights reserved © Zenzi Pty Ltd 2023

Holden HQ Sedan

Introduction

After serving faithfully for forty-six years, the Holden HQ Sedan, a symbol of automotive heritage, faced significant deterioration due to corrosion. This article delves into the consultation process at Auto Resto, assessment of the corrosion issues, and the tailored proposal to address the concerns presented to the prospective client.

Furthermore, it explores the risks posed and the unintended consequences of substandard repairs. Discover how Auto Resto’s process focuses on identifying the root cause and rebuilding the vehicle’s structure from the inside out.

In the case of this Holden HQ Sedan, consulting with our in-house experts who specialize in classic car restoration is essential. Auto Resto possess the knowledge and experience to evaluate the severity of corrosion issues in the vehicle. By leveraging on our expertise, you can gain valuable insights into the extent of the corrosion damage and make informed decisions about the necessary repairs.

The first step of the process is recognising the visible signs of deterioration and telltale indicators that may point to underlying corrosion issues. Rust spots and unsightly blemishes on the exterior, often serve as an early warning sign. Any paint bubbling, may also signal corrosion lurking beneath the surface.

The condition of the vehicle is assessed and a visual inspection performed to identify visible signs of corrosion damage. The potential risks and safety concerns associated with compromised structure are also noted.

For this Holden HQ Sedan, we identified critical areas like the cowl, A-pillars, floor pans, door hinges, and front windscreen prone to corrosion.

Although unknown to us at this stage, this section of the vehicle had been repaired (by others) on two separate occasions. The substandard repairs (presumably cost efficient), had compounded the problem, driving the corrosion deeper into the vehicle structure and inadvertently increasing our scope of work.

Our process involved exploring the root cause of the corrosion issues and restoring the structure by rebuilding it from the inside out.

RHS Front Windscreen Aperture

The photo below shows the condition of the right-hand side (RHS) of the dash after removing the front windscreen, revealing the extent of the deterioration.

20190327_123705.jpg

Over time, moisture trapped by silicon sealer and cosmetic repairs has penetrated into the metal structure of the dash panel. The damage is extensive, affecting not only the RHS windscreen pillar (aperture) but also the stainless steel windscreen trim fasteners.

The corrosion damage was so advanced that it has even reached the upper areas of the plenum chamber and A-Pillar structure. Which was not initially apparent was that the lower reaches of the plenum chamber have also been affected.

RHS Cowl Panel

In the photo below, the owner-provided RHS replacement cowl panel is being fitted to the vehicle. While aligning the panel with the RHS door and fender, significant alterations were necessary to ensure proper alignment of the stainless steel windscreen trim.

20190331_143107.jpg

Following removing of the external cowl panel section, a substantial amount of debris and corrosion species were exposed. Clearing the debris revealed weakened and perforated panel sections caused by extensive corrosion.

This area forms the underlying structure of the cabin, consisting of multiple layers of overlapping panels. It serves as the juncture point for the RHS A-Pillar, plenum chamber, dash panel, and windscreen cowl panel.

RHS Windscreen Pillar / Door Aperture Section

At first glance, this section appeared relatively solid, but closer inspection revealed hidden issues.

20190404_123757.jpg

In addition to the obvious missing lower section, a previous repairer had bronze-welded a patch on top and filled the void with plastic filler. Originally, this section consists of two layers (upper and lower sections) that form the structure.

Internal Cowl Panel Duct (plenum chamber)

While removing the Internal Cowl Duct, we noticed corrosion embedded in the seal on the underside of the plenum chamber. The area where the cowl duct is fixed is shown in the photograph below. Accessing and repairing this area behind the dash was a  challenge.

20190401_203841.jpg

The only reliable solution to address this issue was to remove the entire external cowl panel, providing access to the plenum chamber. If left unrepaired, water ingress into the vehicle cabin could eventually lead to rusting of the floor pans.

Internal Corrosion Issues

Despite the progress made, there was one more surprise in store for us. The vehicle still had unresolved internal corrosion issues, which required further attention. To see the full video of the work completed, check out the title “Rust Repairs-Holden HQ Sedan.”

Rene Farrace

Toyota 100 Series – Front Windscreen

RE:     Toyota Landcruiser 100 Series –  Front Windscreen Aperture (Corrosion Repair)

This document has been prepared with photographic illustrations to highlight the severity of corrosion damage and the recourse of the repairs conducted.

1.0           Initial Inspection – 22/01/19

On the 22/01/19 @ 20:30pm, an assessment was carried out to determine the extent of vehicle damage and to enable an estimate for the repairs to be carried out at the clients residence. From the initial review, a preliminary rectification schedule was compiled and estimated (the basis of the repair scope and estimate was the use of lead filler and two metal plates to fill the large void areas). The photo below illustrates the conditions at which the assessment was carried out (at night and under insufficient lighting).

20190122_202650.jpg

2.0           Vehicle Review – 24/01/19

The vehicle was delivered to the workshop on the 24/01/19 at 09:30am. The vehicle was reassessed under better lighting conditions and the following observations were noted. The photograph below illustrates one of the void areas where the level of corrosion damage was more significant with the corrosion penetrating through multiple layers of the windscreen aperture.

3.jpg

The second observation noted was that the outer turret skin had separated from the internal support frame. This is clearly visible by the horizontal fracture line of the full length of the windscreen aperture.

4.jpg

3.0           SCOPE OF WORK

From the condition review/reassessment conducted on Thursday 24/01/19, the following scope of work was conducted to meet the basic requirements of the repair and return the structural integrity to the panel section.

3.1                Turret Aperture

In light of the condition reassessment and scope requirements, a complete new panel section was fabricated to match the original profile. The fabricated panel was then trial fitted for the correct contour and alignment.

20190124_122641.jpg

Note: the multi-layers of corrosion build up beneath the aperture were obstructing the correct alignment of the replacement panel, so the complete lower lip of the aperture was removed.

10

Upon removal of the windscreen aperture section, the internal support frame was found to be weakened by the corrosion. The area was sandblasted to remove the corrosion contaminants and clean the metal surface ready for welding.

11

The panel replacement section was aligned and held in position by clecos and then fully welded.

12.jpg

3.2                Vertical Apertures

Both of the vertical apertures were found to have localised areas of corrosion around the perimeter of the (pillar trim) fixing holes.

7.jpg

The full lengths of both apertures were sandblasted to remove all of the corrosion contaminants.

4.0           Conclusion

20190131_101430[1].jpg

The remediation of the corroded turret section has been completed above the standard of the quoted repairs. The requirements have resulted in time/cost variations which we have absorb to preserve the integrity of our fixed price guarantee.

René Farrace

1964 VW Beetle Convertible

LHR Fender – Repair

This video illustrates the repair process on the rear fender of a VW Beetle Convertible.

The cracks that were visible in the fender panel were the result of a failed attempt to repair a vertical fracture. The extent of the damage was assessed and a new replacement panel was fabricated to the size required. The damaged area was then cut out completely the new replacement panel was aligned and fully welded.

1957 Chevrolet Bel Air

Rear C-Pillar Restoration

This Chevrolet BelAir had significant corrosion damage in both of the rear C-Pillar’s. The repair process involved the removal of interlocking panel sections which provide the structure. The surface was cleaned free of contaminants and etch primed. The sections removed were re-fabricated and the structure repaired from the inside out.


1968 Camaro


1968 Camaro

This vehicle had the appearance of a very tidy unit albeit for a couple of minor issues at the rear wheel arches that raised concerns.

To investigate the hairline cracks and irregular contours, we started by removing the surface duco from the left hand side (LHS) quarter panel. Beneath the surface was an excessive amount of body filler that in places measured over half an inch thick. This was followed by an additional amount of fibreglass in the rear wheel arches and internal tubs.

Now back to bare metal, the assessment of the LHS quarter panel concluded that there was excessive panel damage and extensive corrosion damage in the internal and external sections of the wheel arch. Given that there is a readily available supply of reproduction parts, It was determined that the most efficient course of action was to replace the complete external skin and internal wheel tub.

Next the right hand side (RHS) quarter panel was investigated and it too was concluded to have been repaired the same way as the LHS quarter panel. The repair schedule was set to include two new quarter panels and also new internal wheel tubs.

The doors both had new external skins replaced, the internal frames were sandblasted and minor rust repairs conducted. The complete front window aperture was cut out and replaced by Rene Farrace. And other repairs included the firewall, the RHS turret and drip rail sections.

The owner wanted to convert the vehicle to LPG and provided us with the pressure vessel. The brief was to have the tank in the boot of the vehicle, but also to retain as much boot space as possible. The boot floor was re-fabricated with the vessel recessed in to it, this lowered the compartment floor level and provided the function the owner required.

This vehicle was delivered in a metal finish ready for paint.

Mustang Fastback

Lead Wiped Repairs

The rust repairs/restoration of the Mustang door pictured here has been repaired by a technique called lead wiping. At Auto Resto we are passionate about providing quality repairs and this is why we still practice this old art. This is our way of providing a budget friendly solution and still maintain the quality of a metal finish.

This Mustang is a fine example of a picture perfect vehicle. Although there were some major issues with both the driver and passenger doors. The corrosion in the lower sections of both doors were so bad that they had to be removed to be repaired.

This slide attached illustrates the Mustang door removed from the vehicle and the internal mechanisms completely disassembled. The next step in the process for this door is for all of the corrosion to be removed by abrasive cleaning. Hence the reason why the door is just a shell.

Although sand blasting is the best method to completely remove all of the corrosion deposits, the process can create issues far beyond just the repairs required. For example, if the door mechanism, glass and window regulator were left in the door, the fine grit would penetrate into the mechanism and fowl the operation. If the abrasive made contact with the glass, you can kiss that good bye too! As laborious at it might seem, prevention is far more sensible than the grief, time and cost and of locating & replacing damaged parts or components.

At Auto Resto we pride ourselves with providing quality solutions that endure the test of time.


1965 Ford Mustang

The photos illustrate the Ford Mustang firewall conversion to right hand side drive .

The old firewall was used as a pattern which was inverted, re-fabricated, aligned and fused welded in place. The process included the relocation of the heater box and the location of the inlet/outlet hoses.

The brake booster was then re- located and the firewall was recessed to provide clearance and the correct placement of the pedal assembly. The steering column was then aligned with a protrusion was made through the firewall and secured with a bespoke end plate.

The repairs were then sandblasted and etch primed to seal the metal surface from atmospheric conditions during the restoration process.

Honda Prelude – Rear Window

At Auto Resto we are all about corrosion remediation. Although 80% of our work is vehicle restoration, we also repair corrosion in modern vehicles too.

Just like this Honda Prelude, window rust is a common problem for many vehicles. There are multiple reasons why this situation has occurred, but the obvious is the build-up of decaying plant matter.

The build-up of vegetation has retained the moister long enough to permeate through the surface coating and with the assistance of readily available oxygen, this has created localised corrosion cells.

As illustrated, the extent of corrosion damage was so deep inside the metal structure, that the contaminated section had to be completely removed and duplicated.

The fabricated repair section was then fused welded in replacement and sanded off to a metal finish.